Day 139 @ ITP: Recurring Concepts in Art

Week 1: Assignment #1
Reflection on our first class


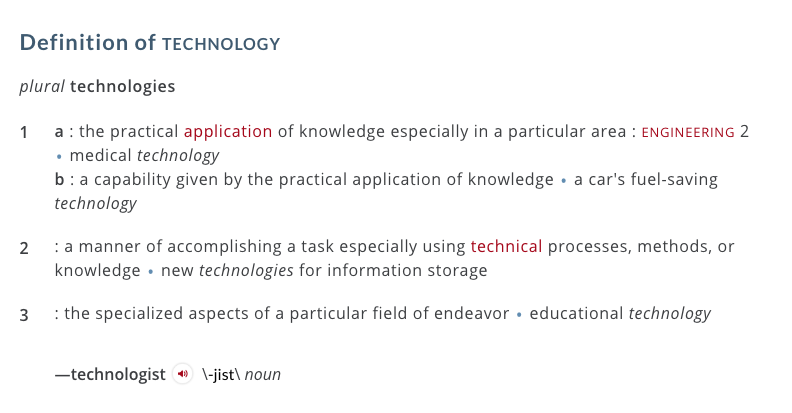
"What is technology?"

Marcel Duchamp "Fountain" (1917)Source: https://events.nyu.edu/#!view/event/event_id/192730

Marcel Duchamp "Fountain" (1917)

Source: https://events.nyu.edu/#!view/event/event_id/192730


Our first class gave me a lot to think about in terms of the role of intention in art. Just that if you have a basic message it can be translated through any medium, or even using the human body and/or substances found in nature to express it. Is the medium the message or is the message going through medium? I guess it is has to be one and the same in order for it to get across to the viewer, or two sides of the same equation. But intention is a vital part of it, possibly at times, like in the pieces we looked at in class, just as much as each "1" is in the math equation 1 + 1 = 2, with the result representing the artwork fused in equal parts with the intention. However sometimes the intention does not get conveyed in art properly, so there is an art also in choosing the medium and how to make choices with materials or the "medium" along the way in order to express what the artist is trying to get at and get that balance right. And sometimes maybe there is no intention but the viewer can find their own meaning. But is there ever really no intention? 

 
Screen Shot 2018-01-26 at 4.02.12 PM.png
 

It is interesting to think about tools, or what we think of as technology. In the Brian Eno biography "Visual Music" which I am currently reading (very slowly), Eno quotes inventor Danny Hillis as saying "technology is the name we give to things that don't work yet. When it works we don't call it technology anymore." So we see the bits and pieces that make up a device which assists us to do something as the technology, but not the device itself? A circuit board or a touch screen is technology, but not a phone? A fuse is technology but not a light bulb? Is that really how we perceive things? 

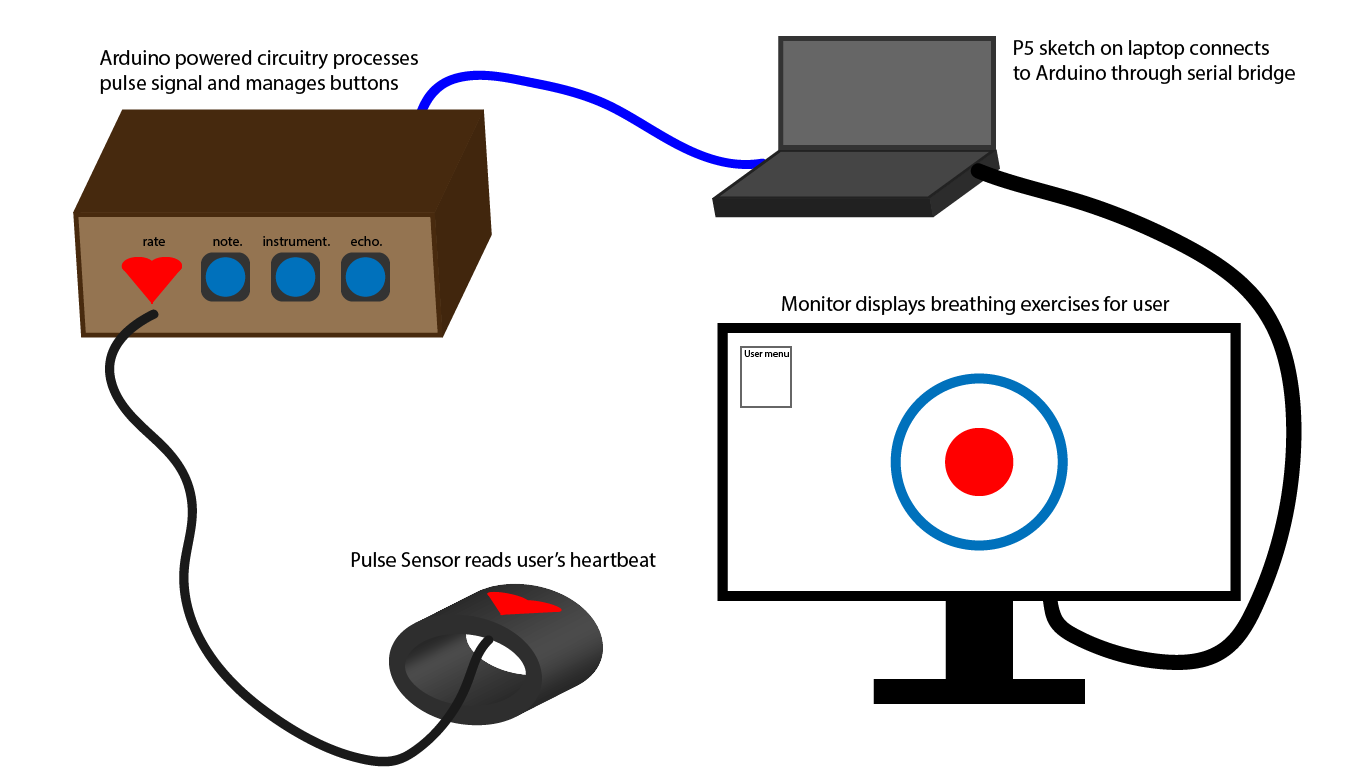
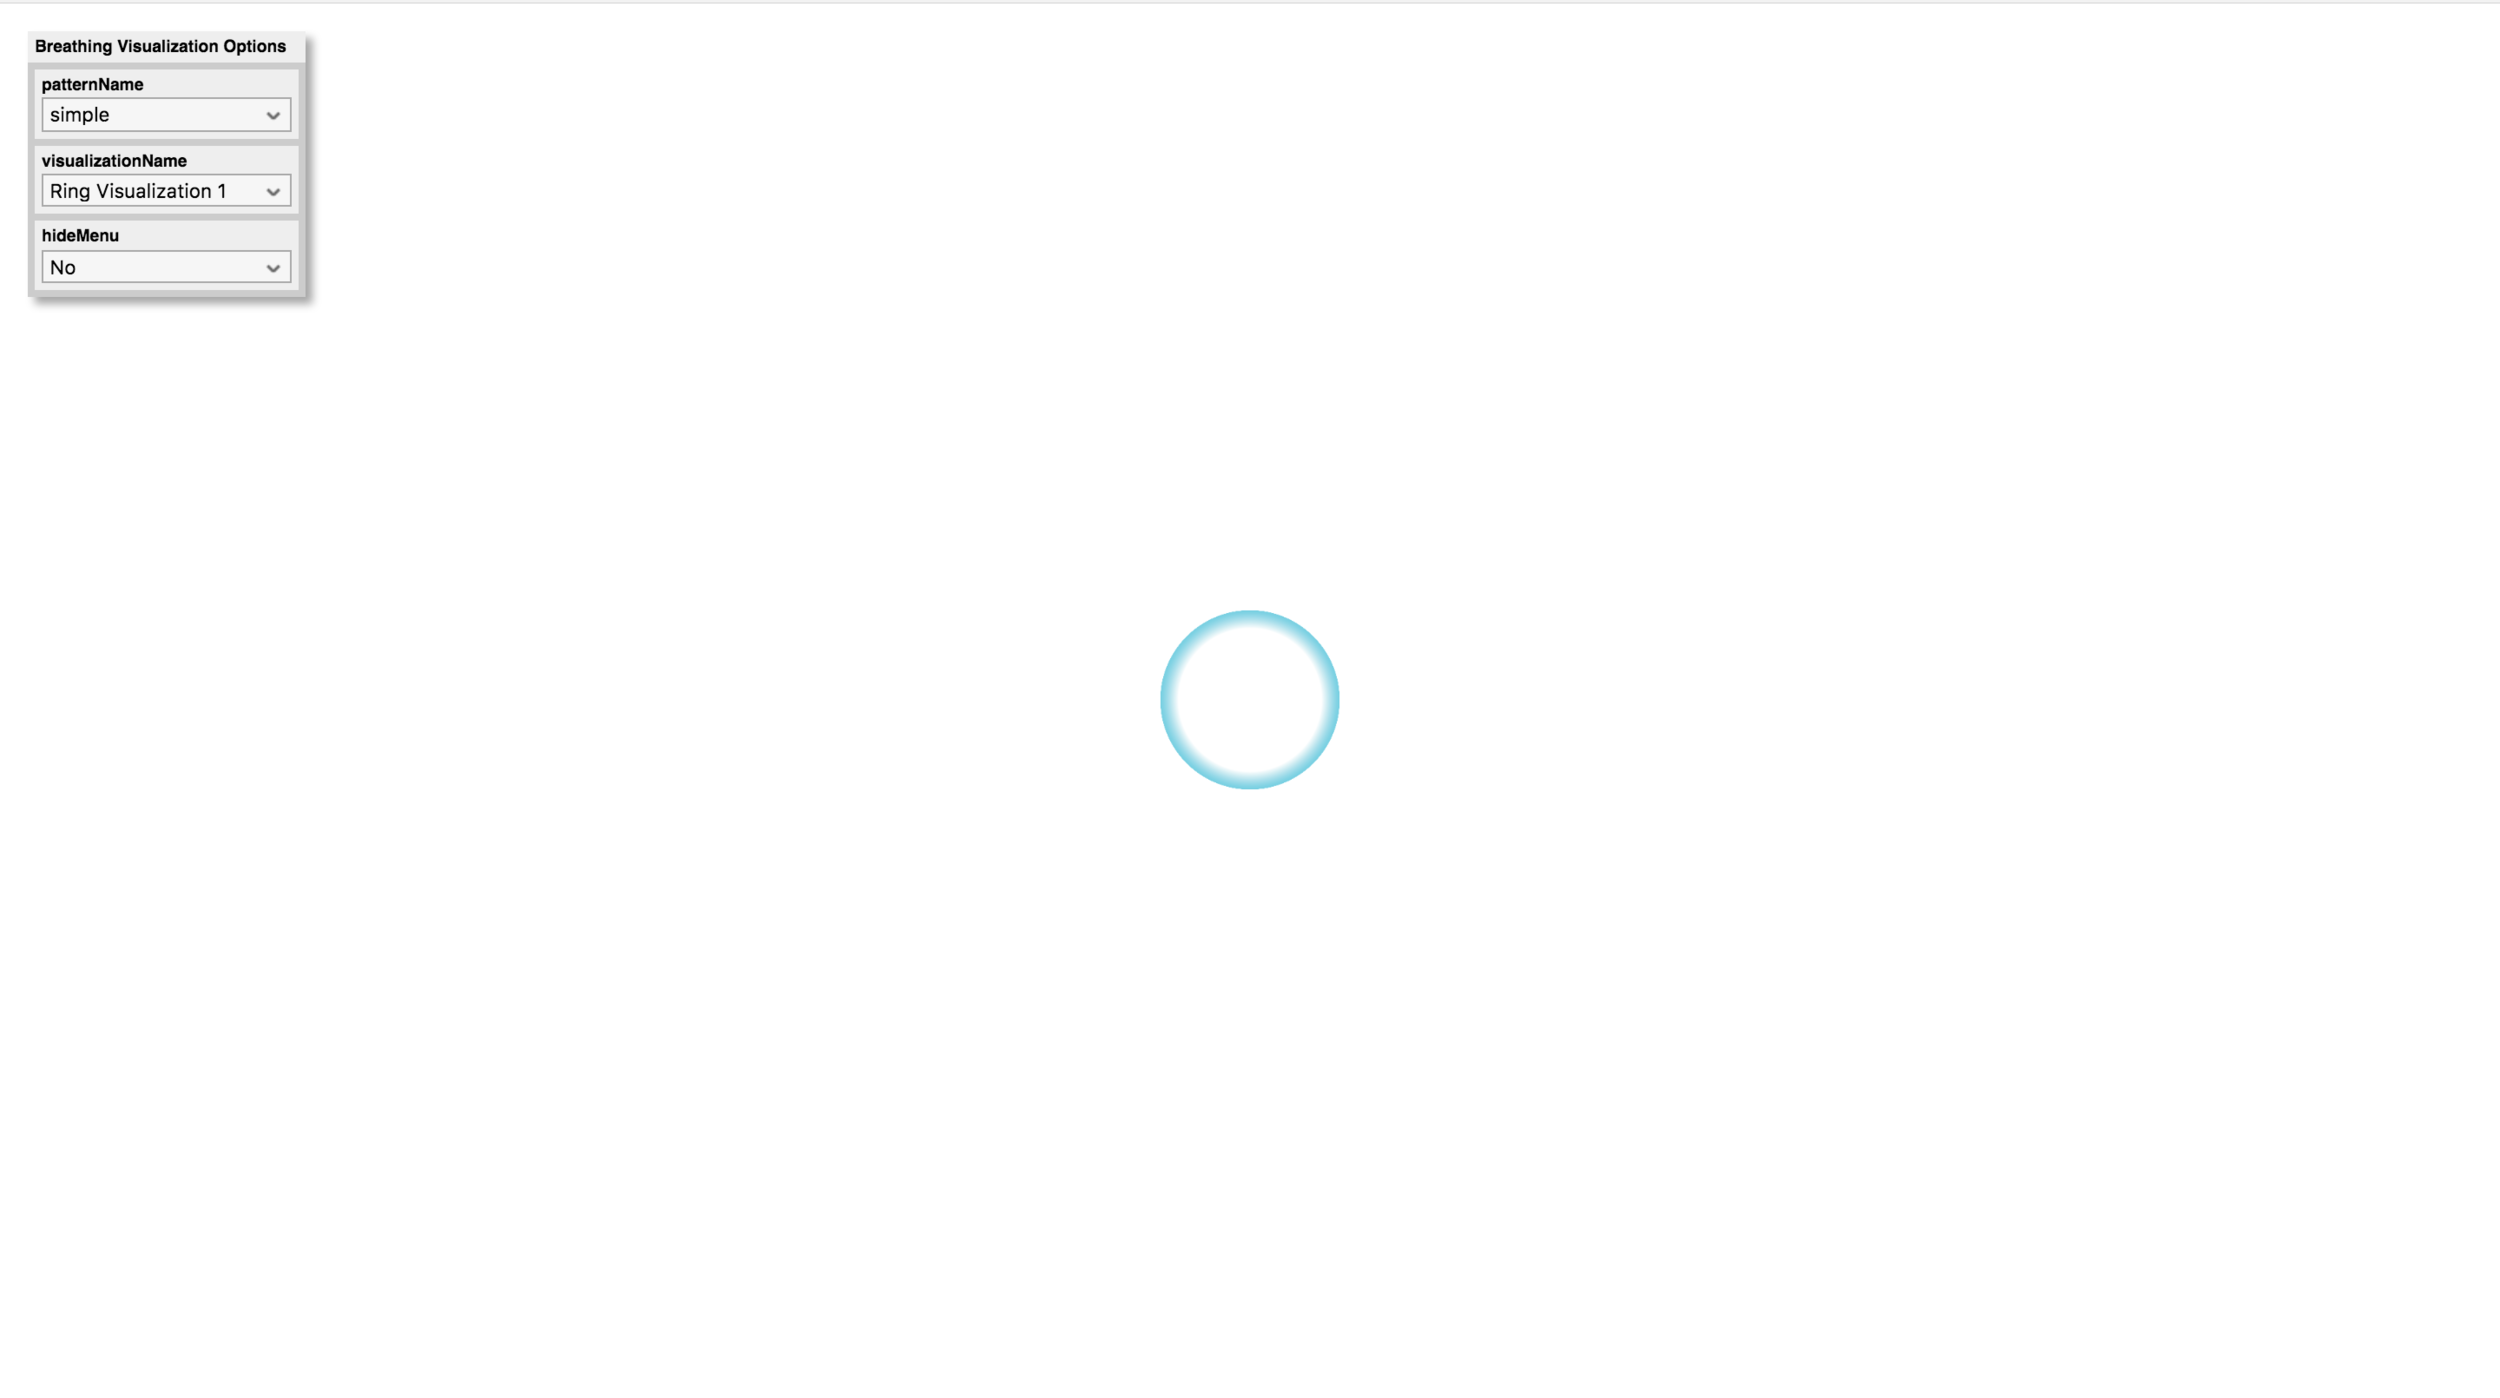
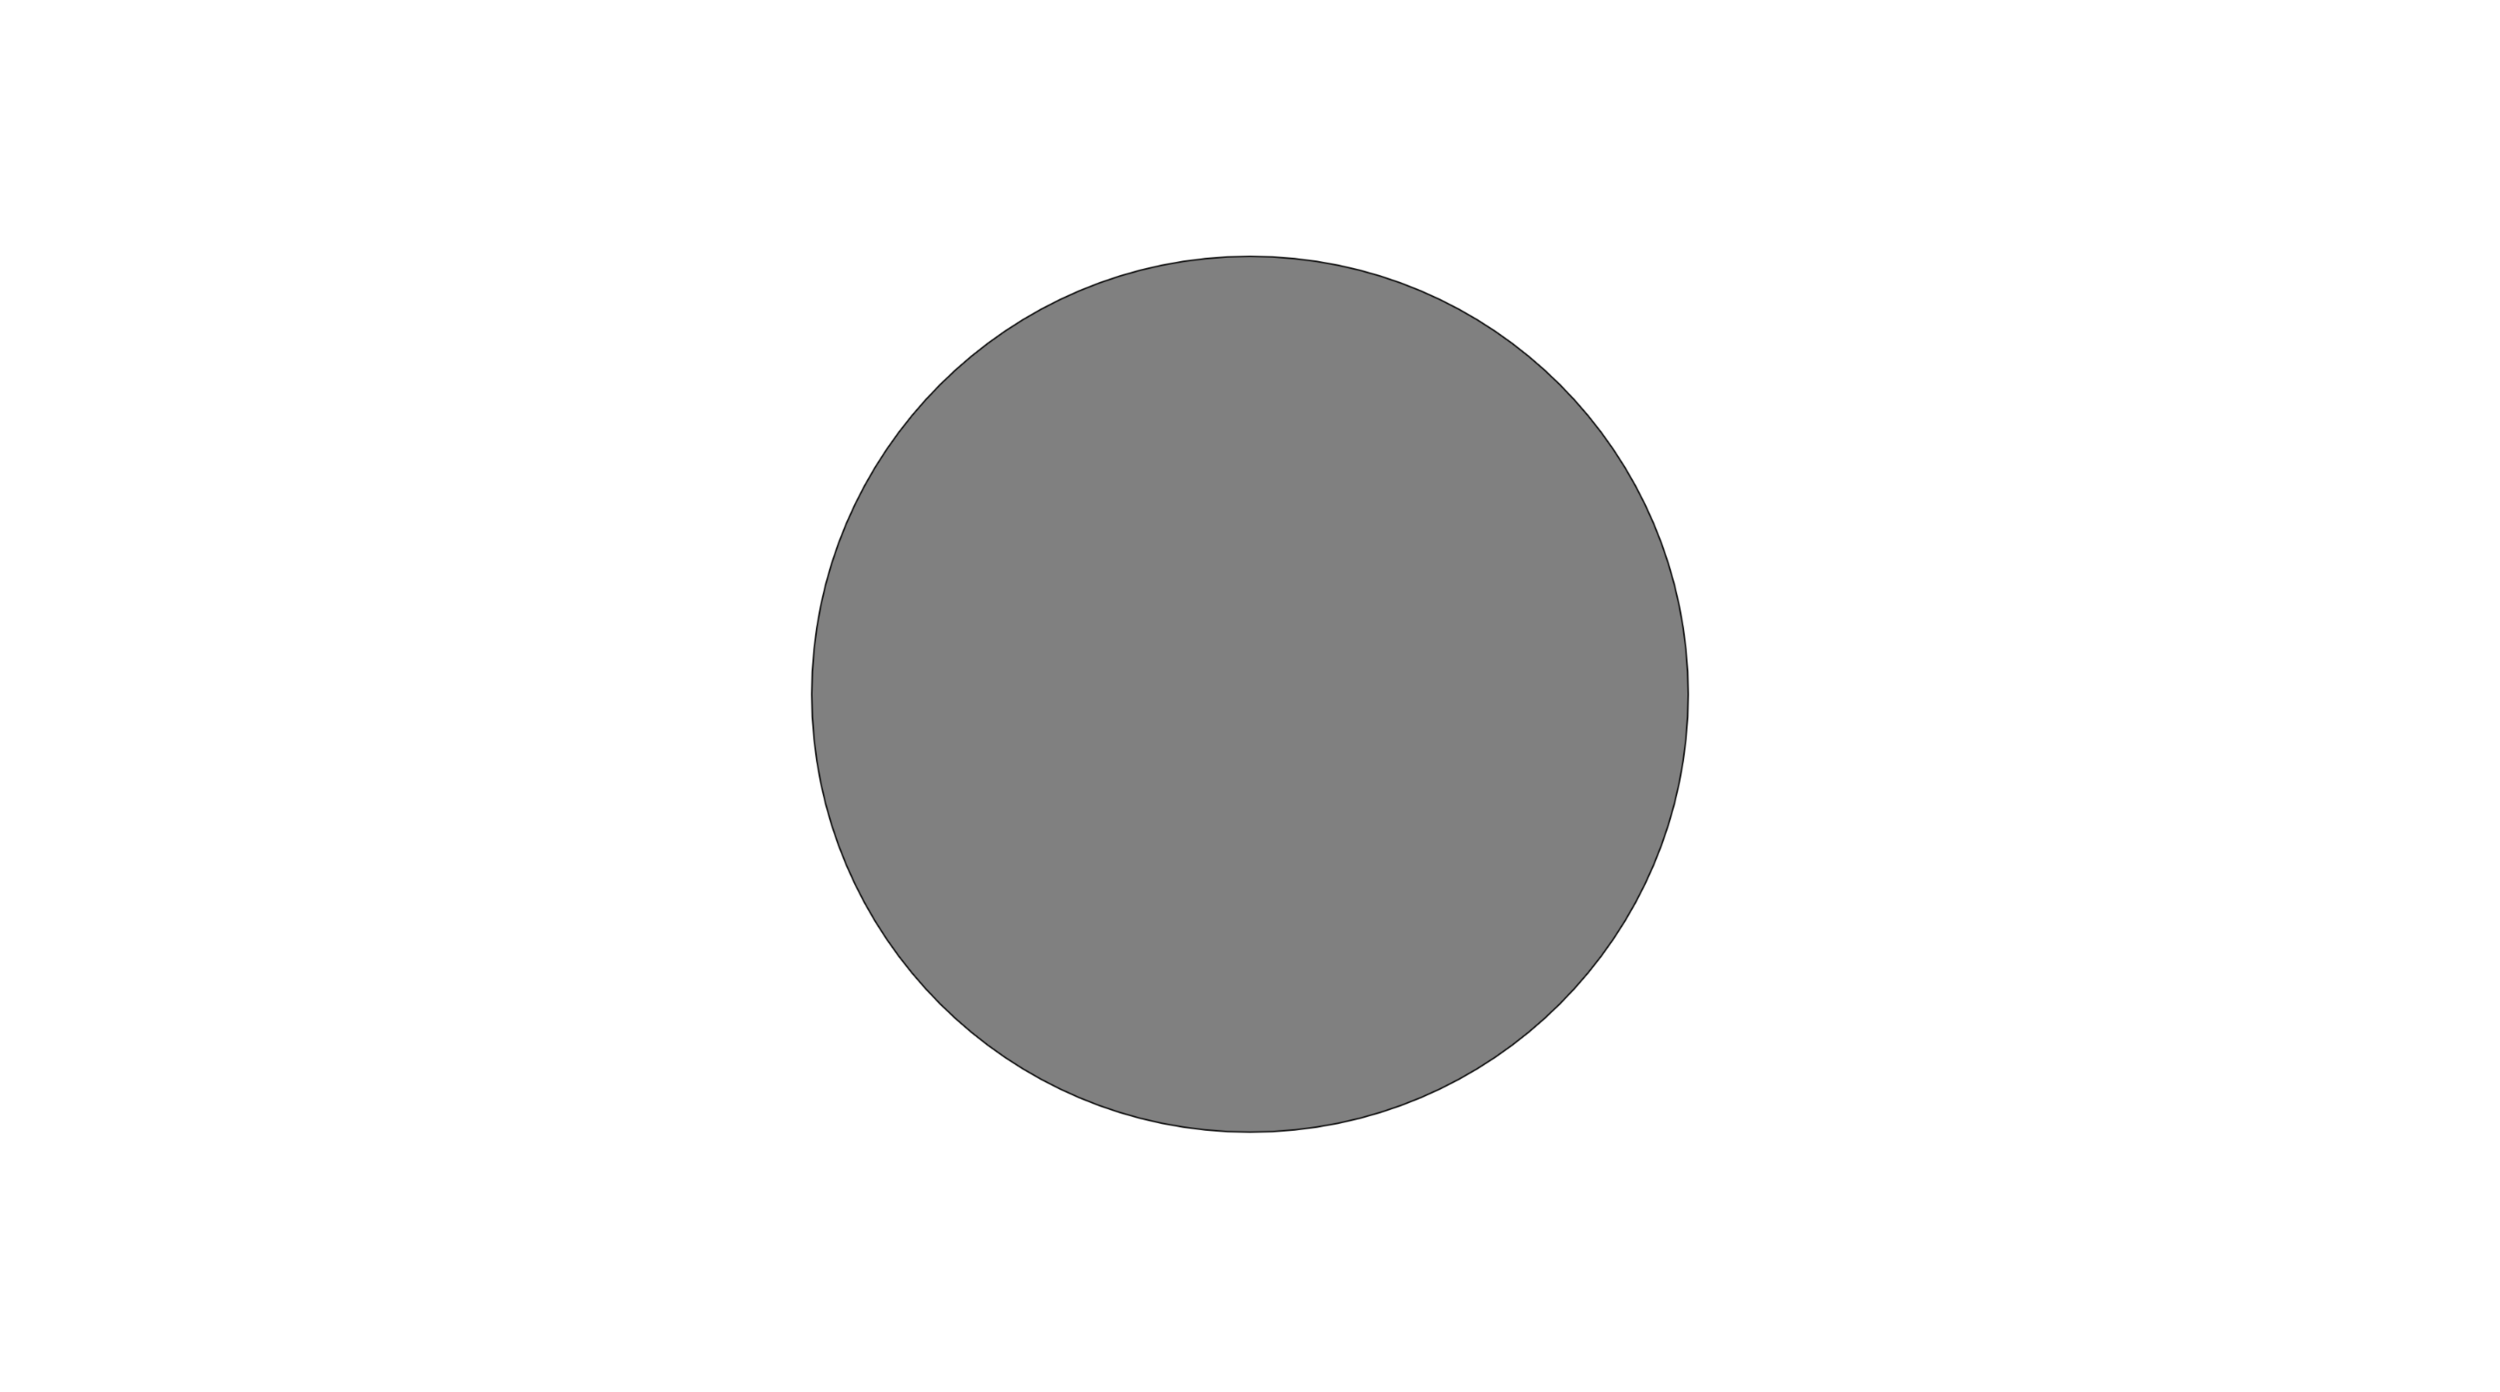
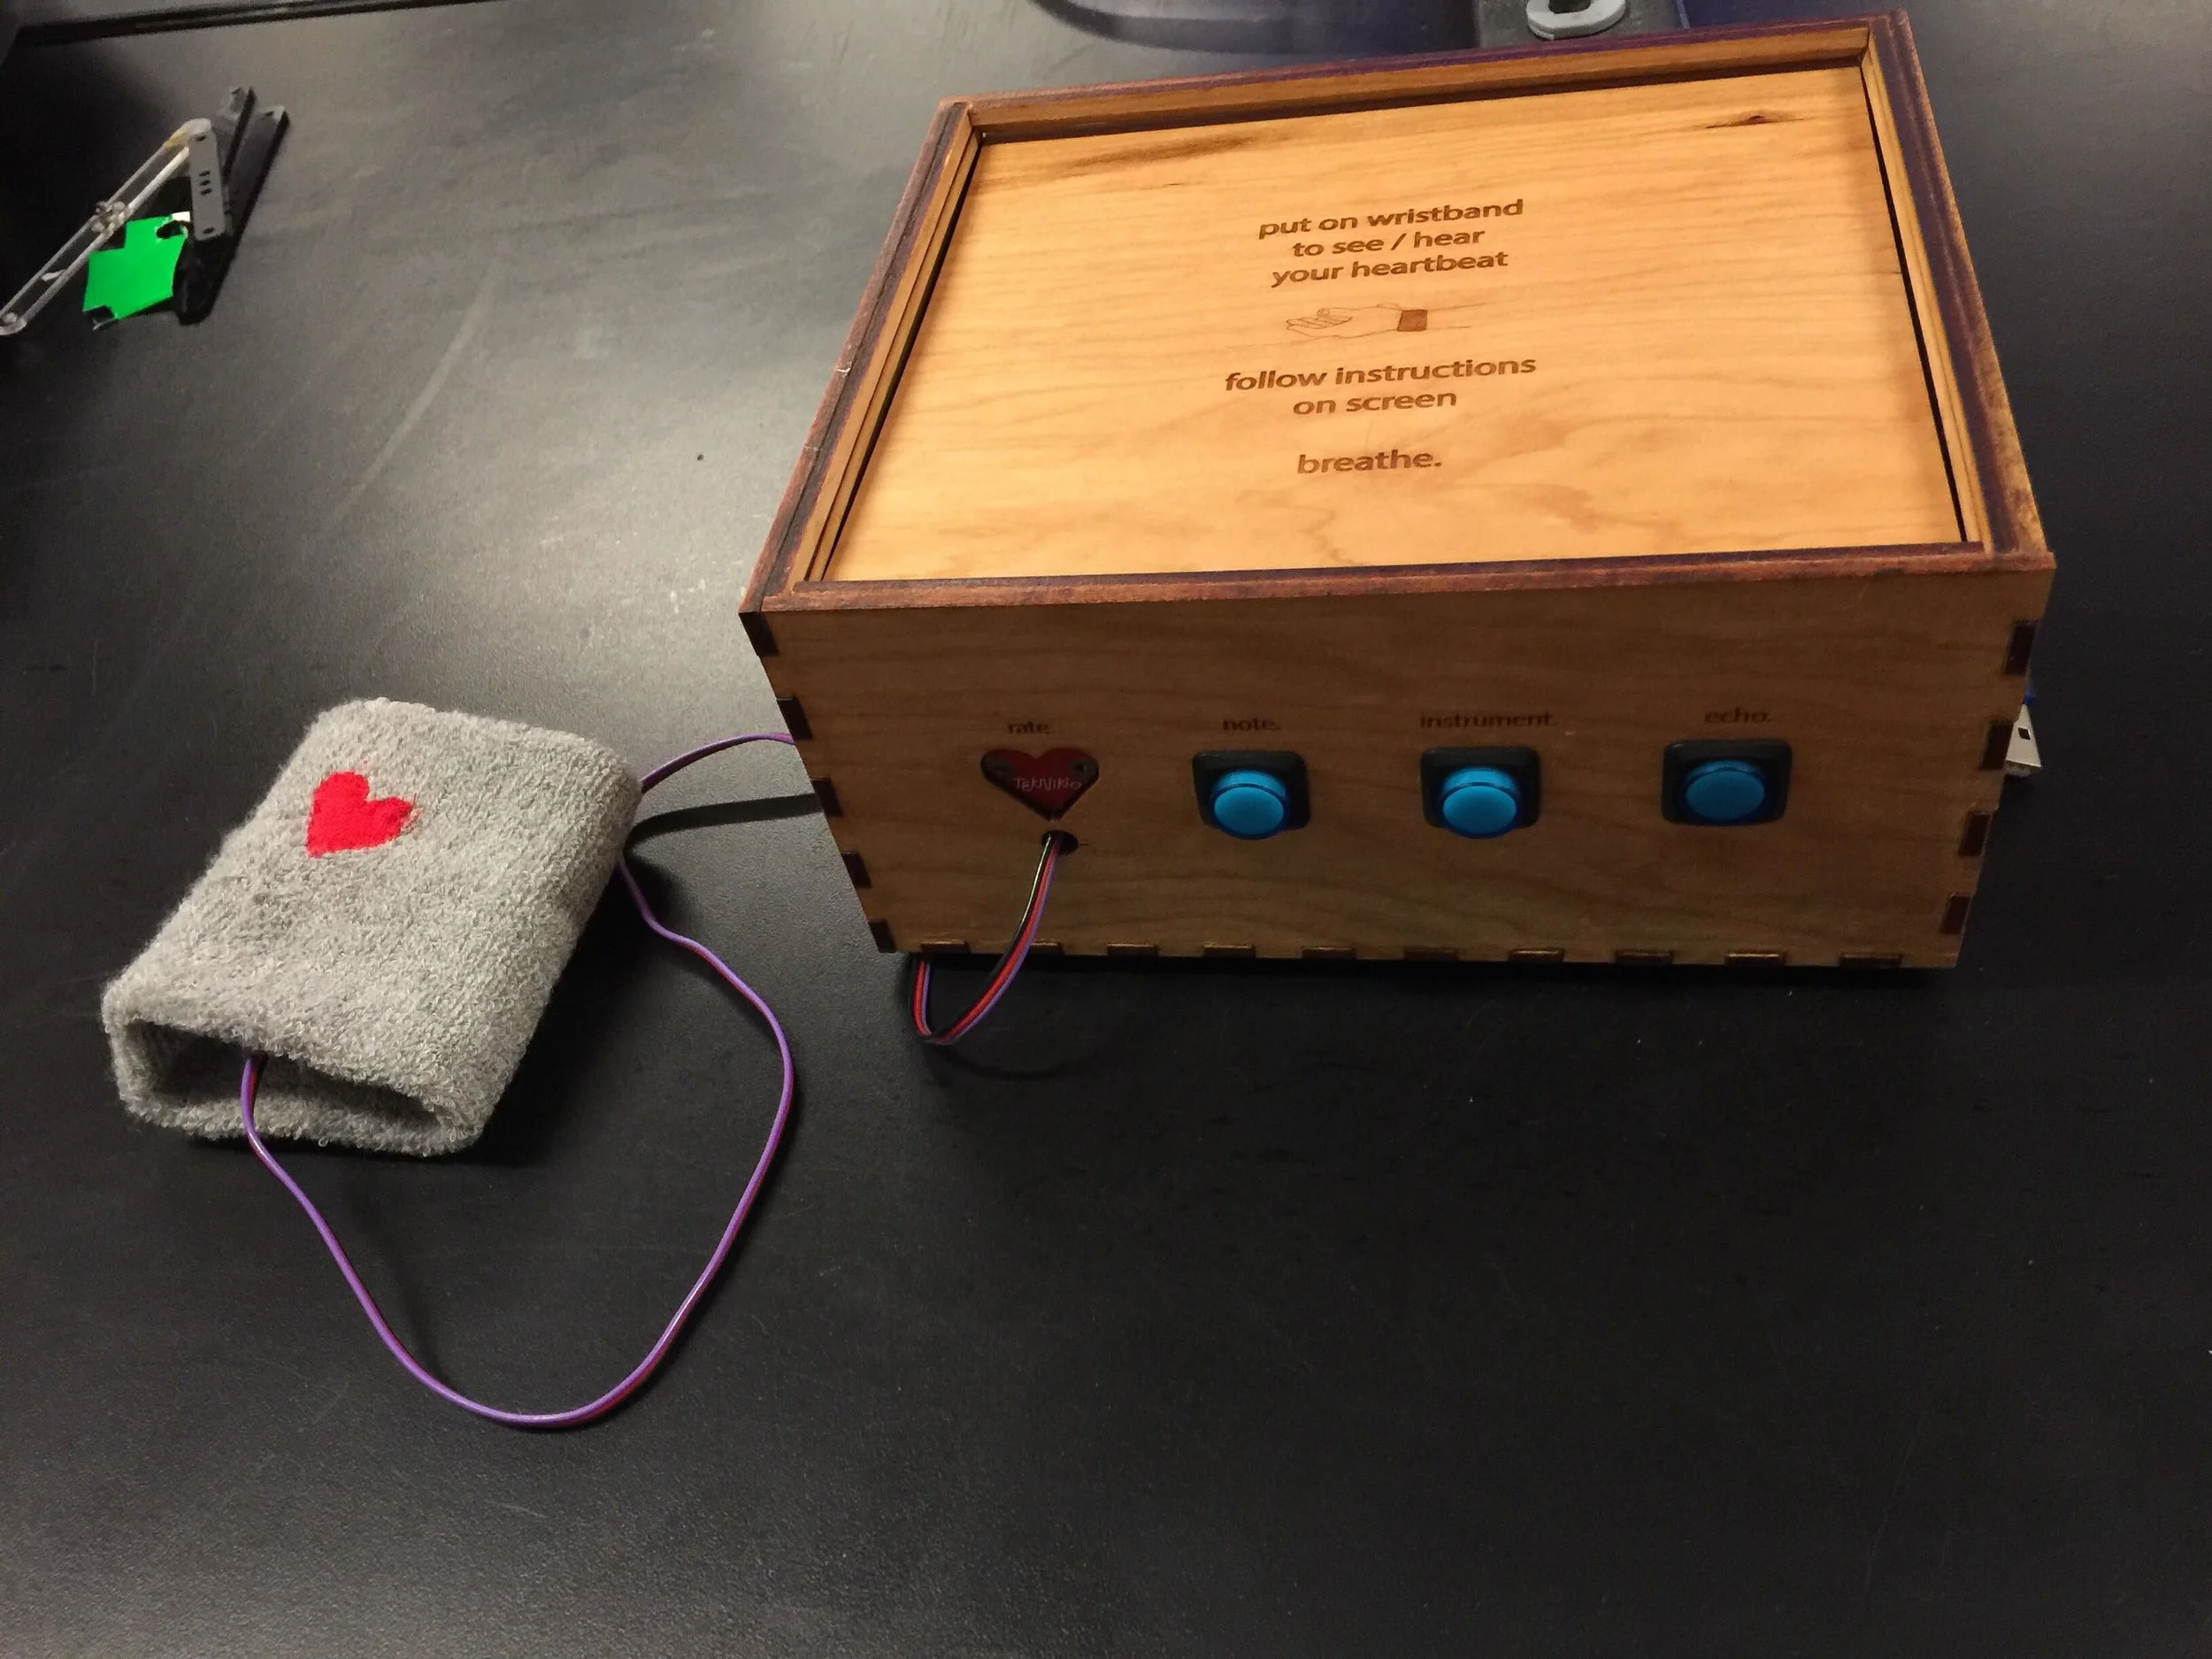
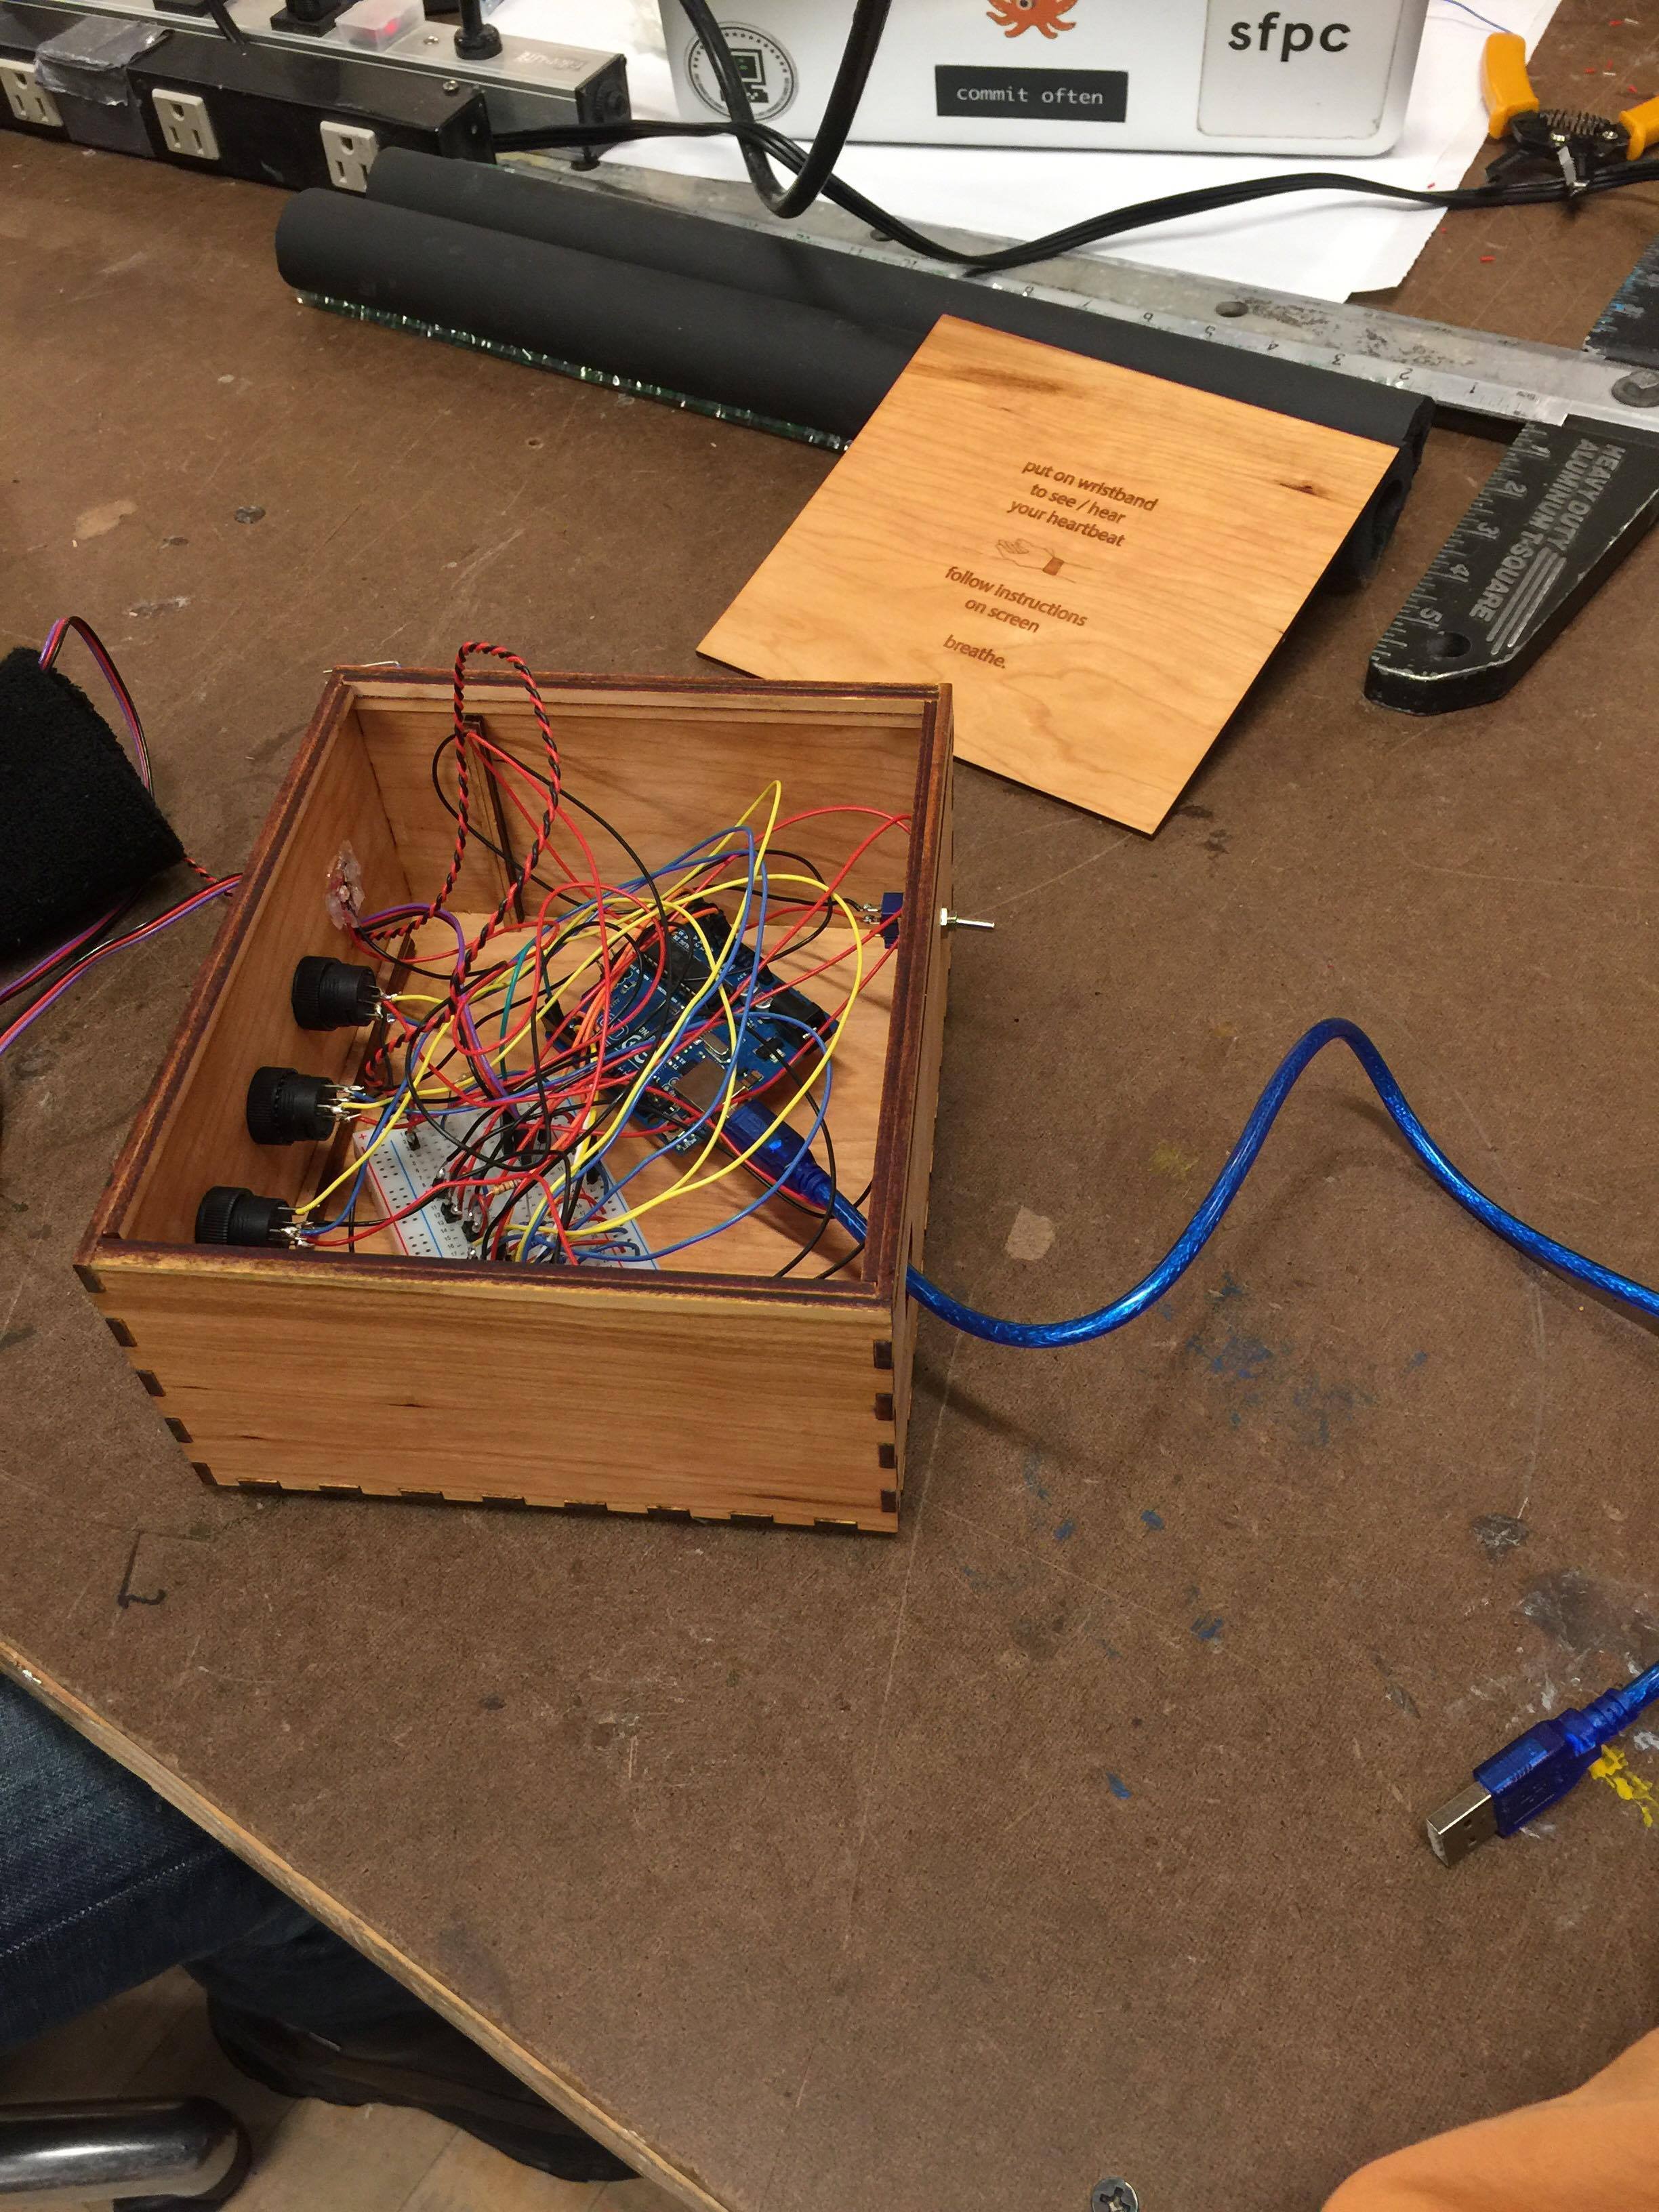
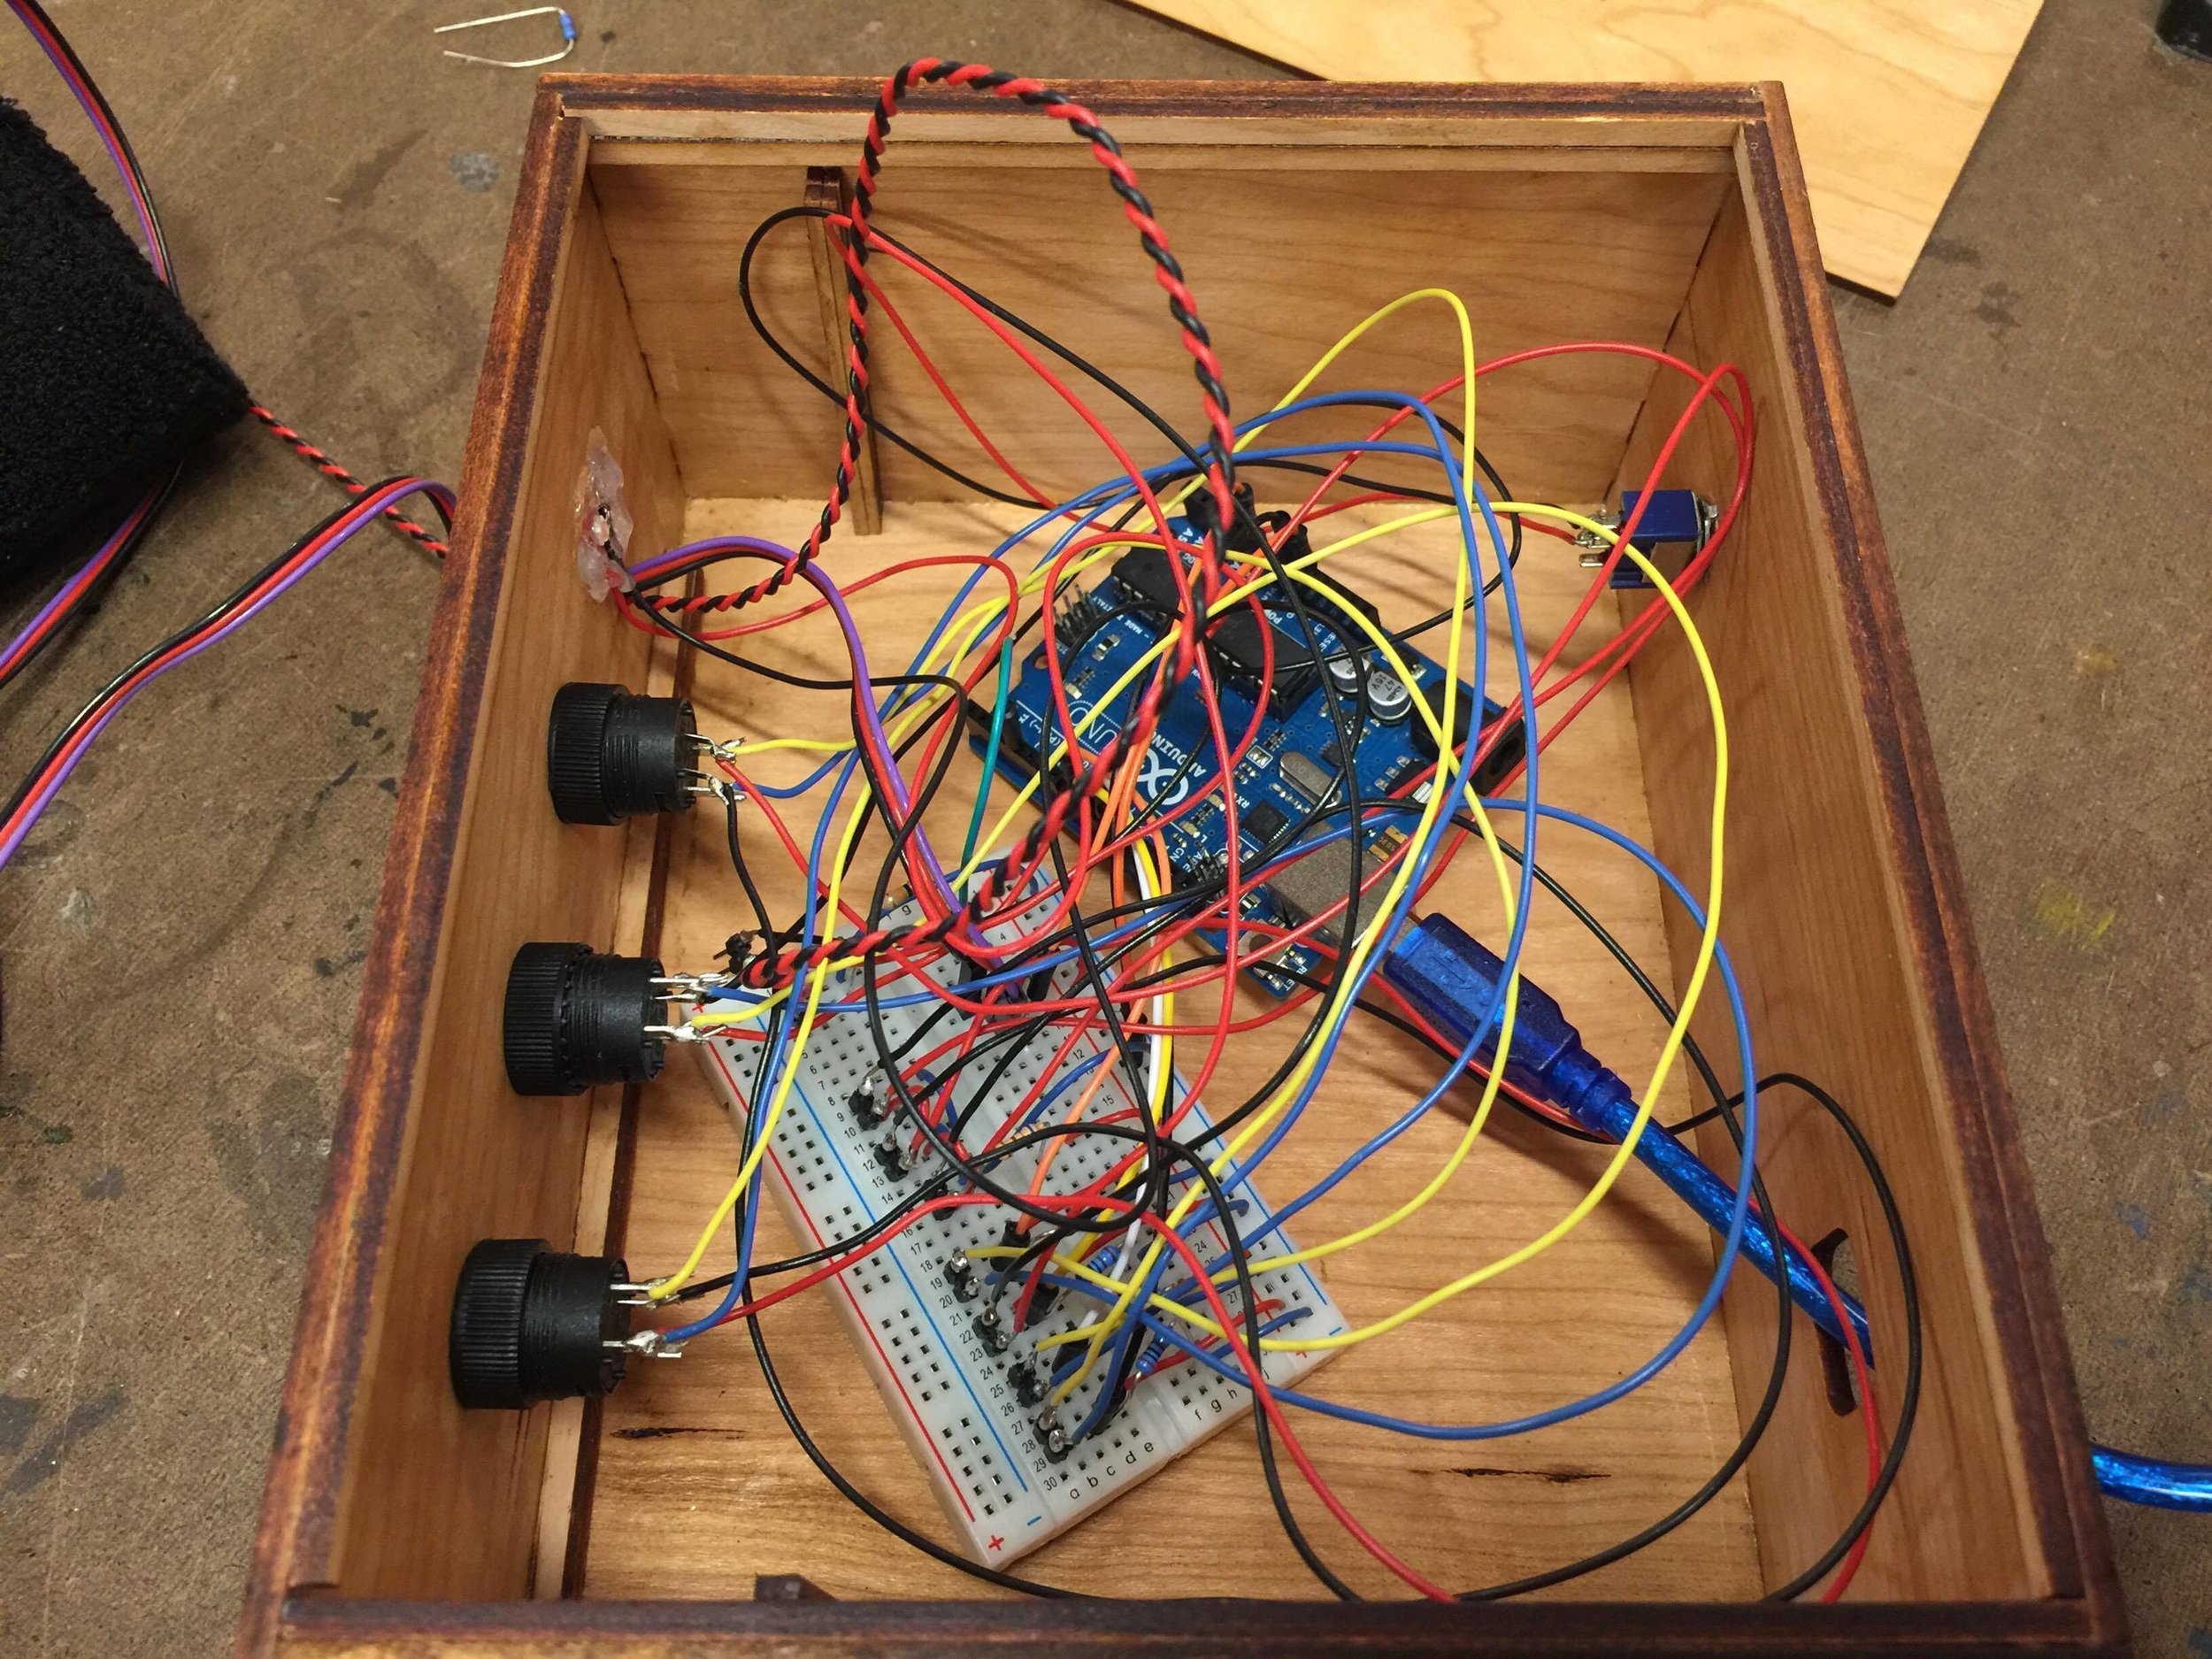
I tried to think of how I would replicate the final project I did for my Physical Computing class last semester without "technology". It was a project which involved a person's heartbeat being sonified using a pulse rate sensor, an Arduino, and a computer program which played sounds and showed a breathing visualization. For the "technology free" version maybe it could involve someone listening to another person's pulse with their fingers, and then following each pulse by creating a sound with their voice sonically, and some other hand gesture could be made by another person, for the person meditating or user to follow as a breathing exercise, maybe a circle of the arms getting bigger and smaller. However it could also be argued that the voice is technology, and the human body is an analog synthesizer that can resonate with its own voice. In this example also the arms are being used practically to do something in a way that could potentially be seen as technology in order to achieve a means to an end. In this way anything that can be used to "do" something could be viewed as technology. 

I would personally say that something becomes technology once you use it for something other than what it was originally intended to be or do in nature. Something "extra" or added. You can make an instrument out of a piece of wood, but that is not what it was explicitly made for. Trees grow to exist and be part of the planet's ecosystem, which is also arguably the inherent "technology" or ancient design of Planet Earth and the system which is (or was) in place in nature. Once the wood has been shaped into a paintbrush, and synthetic or horse hairs applied as the paintbrush head, that makes it something explicitly designed for painting and thus a specimen of "technology". In terms of sound, many objects in nature can be used to create tones and vibrations that are not necessarily intended to be used as such. A monkey may also use a sharp rock to hit on a fruit in order to crack it open and eat it. Does that make the rock "technology" when it is used that way? Is it not technology when it is not?

Similarly the human is designed to breathe, walk, eat, etc. and also to sing, but singing is not necessarily the express purpose of having the form of a human body or the most essential one. A human body is meant to survive and live. However, singing is something we can do with it, and it definitely can make the contexts of our lives richer to use it in that way, and to hear others use it in that way. 

Syllabus

Day 102 @ ITP: Phys Comp


great-heart.png
heart_anim.gif


“Great Heart” is a collaborative project created for Tom Igoe’s Introduction to Physical Computing class by Jim Schmitz and Camilla Padgitt-Coles. The project uses a pulse sensor to detect the user's heartbeat and translate it into sound. The user can hear their heart rate sonified and follow breathing visualizations which are designed to guide their breathing to help users achieve inner peace, release anxiety, and slow their heart rate down. The user puts on a wristband with the pulse sensor attached and sits as long as they choose with the sounds and visuals.

Using push buttons on the device’s enclosure, the user is invited by the audio guide on the Introduction screen to choose from different instruments and notes to represent their heartbeat. Their heart rate is also represented as a pulsing light on the enclosure and as a pulsing light next to the breathing exercises in P5. After the meditation has finished, the user is told what their beginning and ending heart rates were.

There are two options: A "challenge" mode where the program stops once your heart rate has slowed by 10%, and a "meditation" mode where the user can sit and breathe for a fixed or variable duration (for the winter show we chose a 2 minute duration).

The project is modular and allows the freedom to change the audio and visual aspects and various components of the program in P5 as needed. The Arduino sends the heart rate data and button-press messages for the instrument, note and sustain on/off buttons through serial communication to P5. The rest is coded in P5 using Javascript, audio samples, and images.

Our project on GitHub
https://github.com/hx2A/p5_meditation

References:
Pulse Sensor Amped
https://pulsesensor.com/products/pulse-sensor-amped

https://github.com/WorldFamousElectronics/PulseSensorPlayground

https://github.com/WorldFamousElectronics/PulseSensor_Amped_Arduino

MIDI Sprout
https://www.midisprout.com/

Heartmath Institute
https://www.heartmath.org/research/

Circuit diagram

Circuit diagram

 
System diagram

System diagram


Note:
We will be adding a product demo video using the school's cameras over the break in January. We will also tweak the code a little for the heartbeat detection and make one more enclosure. If possibilities come up to show it in a different way or different setting I will be blogging about that here as well!

Day 99 @ ITP: Fabrication

I'm honestly getting to this late, because the last week I was mostly consumed by my final for Physical Computing and ICM and working on that project right up until the deadline (which did involve some more fabricating and expanding on things I did earlier in Fabrication class, but not for this project). I was suggested by two people to play with something to do with light - which is something I have done in a live projection setting but have been meaning to play with in terms of building some things at ITP. However I think whatever happens today will have to be pared back a lot (!). A friend suggested making a Dream Machine, and I think with one of the things I have I will be able to make some kind of miniature version of it using a small servo motor.

Screen Shot 2017-12-13 at 6.06.07 PM.png

Update 12/14:

The "dream machine" cutout was too heavy for the platform and motor I was able to get working (a DC motor, in the end.) So I created a prototype of something else inspired by it--the "lightning machine" -- which may look better through video than in person, but possibly could be fun in a large darkened room with a flashlight. Will try that out today in class and see how that works.

Materials: 
DC motor
2 AA batteries
Solder
Hot glue
Piece of wood board
Gaffer's tape
Piece of mylar emergency blanket (gold and silver)

25435525_10100456732885474_881422196_o.jpg
In progress 

In progress 

Update 12/16:

My friend ended up actually being inspired to use this contraption in a recording for an abstract dance piece. What I thought was a haphazard compromise ended up being a pretty cool musical instrument. It also actually looks beautiful and like an optical illusion sometimes when it spins without flopping on itself (unlike in the video below, where it is flopping, and I am also shining a flashlight on it while crouched in my closet). It is strangely relaxing to watch/listen to. Maybe I will document it more later as I never got a final photo or good video. I liked what my classmate said about how it reminded her of ASMR videos on YouTube. It's cool when things surprise you like that. In the future I would like to try making some motorized light and/or sound sculptures sculptures building off of ideas that came from this.

Day 98 @ ITP: Phys Comp + ICM

The time has come! Our final class for Physical Computing is tomorrow. Jim Schmitz and I have been working on this project since we were assigned to work together on the midterm project in October. We have spent a total of around 10 weeks of conceptualizing and prototyping, coding, fabricating, troubleshooting, rethinking, reworking, and ultimately finalizing this second phase of our idea. I think there are various directions this project could go in should we choose to do so, and manifestations it could take in general as an idea, and many ideas that will come of having worked on it potentially for other things I do after this (I can't speak for Jim here, but I hope it is the same case for him as well!) 

Today we met to finalize a few details which were keeping us from being 100% finished with the goals we had in mind for the final presentation. It was pretty down to the wire time-wise, but the last things we wanted to add though seemingly small are additions were ones that we felt would add infinitely to the user experience and conveyance and reception of the meaning of our project to someone who doesn't have us there to explain it to them. We updated the code to read the beats per minute, through registering the time it takes for a full heart beat sine wave to register, then repeating it (like a "stamp"). We decided to do this based on the feedback I got while presenting to my ICM class from Allison and my classmates about how it was distracting that the sensor would miss beats, and how it would not be unethical to fill in the missing beats through approaching it in a different way. With our new setup, once the sensor gets a new piece of information about a heartbeat it continues to play the sounds at that rate until it gets a new piece of information, which updates around every five seconds. This way we are able to provide the user with a consistent heart rate sound, which is ultimately more calming (some people were starting to worry if there was something wrong with their heart). With this method we are able to keep it steady without sacrificing the validity of the data that we are showing them/playing as a sound for them. As it is, it tracks heart rate and whether or not it is lowering, with a slight delay. The notes and flashing heartbeat colors in the visualization play at a rate set as 1 minute (or 6000 milliseconds) divided by the beats per minute, which consistently updates the rate at which the sounds are being played:

Screen Shot 2017-12-12 at 7.48.54 PM.png

We also added a "Challenge" version, which uses this new heartbeat bpm data to track when the user's heart rate has lowered by 10%. At the end of both the "Challenge" and "Duration" options the user sees their initial pulse rate next to their final pulse rate at the end of their session.

Here are some screenshots of our current visualizations:

(Jim sewed a heart onto the new wristband!)

(Jim sewed a heart onto the new wristband!)

Great Heart enclosure version #2

25346535_10100455872389914_397659977_o.jpg

We also recorded Jim's voice for the audio guide. We were planning to record our classmate but something came up. Maybe we will record other versions in the future if needed! And ask her again. But I think Jim's voice was actually very calming, and appropriate since we've been working on it. We decided to use a male voice also because in general voices in technology are female, though I'm not sure about instructions... In any case, we now have an audio guide, which I will also attach here: 

Welcome to Great Heart.

Using your left wrist, carefully put on the wristband to see and hear your heartbeat, with the heart placed over your pulse. This is where the sensor is reading your heart rate.

In a moment you will hear notes in sync with your heartbeat. Feel free to adjust the sound using the blue buttons on the enclosure.

Lay your left arm on the table, palm facing up, and hand relaxed.

Take in a deep breath through your nose, if you are comfortable.

Press either button to start.

Choose a visualization on the screen, and breathe in and out deeply as the shapes gets bigger and smaller.

Breathe in: ...2...3...4 (Breathing sound in through nose)

And out: ...2...3...4 (Breathing sound out through nose)

Tomorrow we plan to project Great Heart through the classroom projector as well as plug into the classroom speakers. It should be fun to see and hear it big (as long as everything goes as planned)! We also found out that the project will be in the winter show which starts this weekend. There it will be displayed with headphones and a monitor. It's been very educational and inspiring to work on this up until this point. Further documentation to follow... 

The code for our project can be found on GitHub here

Day 96 @ ITP: Phys Comp

Yesterday I came to ITP and laser cut two more enclosures at a larger size (and failed to take photos of the process, but will take more later of the finished project). I made two because the wood was curved and I wasn't sure if they all would fit. It turned out that was true -- Ben Light was right, these boxes are tricky! However it still seemed like the best option for me at the moment to make sure it would stay together. 

In the afternoon Jim and I met up to make some new breathing visualizations. We added a "breathing rectangle" that grows up and down the screen, and a polygon that unfolds open with your breath cycle. We also beautified the "gui" or computer program pages he had started in P5. He also showed me how to "beautify" my code! Which is also helpful to find mistakes or places where you forgot a bracket or where it is broken.

Today we met again and wired up the new enclosure. Everything fit, however I think the enclosure could still be improved upon, maybe if I use flatter wood and also take my time more with glueing, as it was a bit of an ordeal trying to glue it last night, partially bc my plan was not thought out and I assumed it would be simpler than it turned out to be. I got some glue marks all over it which I think I could avoid in the future by removing excess glue with a dry cloth. 

It was helpful to wire up the new enclosure because it reminded us of how we organized the wiring on the Arduino/Breadboard, and also made it clearer how we would repeat it in the future if needed, and what we would change. 

We also attempted adding a heart LED onto the wristband which would also blink with the user's heartbeat, but for some reason that is not working yet, maybe because the LED is broken? We will troubleshoot later. 

25435453_10100456733384474_1174901435_o.jpg

Next up we will:

- Meet with Tom tomorrow afternoon for feedback before we continue.
- Troubleshoot the heart LED on wristband
- Update the heartbeat detection algorithm with Jim's reworked code to read the heart rate intelligently guess where missing heartbeats would go, to make the sound more consistent.
- Possibly add an option to view the heart rate.
- Have the dropdown menu show up when viewing the visualizations.
- Finish coding the "challenge" vs "duration" options and how those will work.
- Record audio guide

Day 96 @ ITP: ICM

I decided that my "musical sandboxes" project is something that maybe I will continue to work on over the whole course of ITP on my own or in classes, and I would like to refine different ways of making it in code or as a combo of software/code/physical objects. But for this semester since I am also working simultaneously on a project for Physical Computing that is using P5, it seemed to make most sense to focus on that and combine both finals and get the most out of that project, since it is also one that I am very interested in.

Recently we updated the code to add more breathing visualizations using P5 that I will screen capture and share here for this upcoming Wednesday. We also created a kind of "computer program" in P5 which I did not show at the final ICM presentation as it was not finished yet, which has an intro screen that leads you to the different visualization options, and a final screen that thanks you for participating before clicking back to the beginning. Using the basic infrastructure of this program, and the things I've learned this semester in ICM, I think I would be able to combine the code I worked on with Jim with various ideas and will definitely be referring back to the code we worked on together for future projects (and possibly for different iterations of our project).

Right now it is very helpful to have a modular system that is easily changeable, and to manage it in separate .js sketches so that we don't break our code. I'm learning about organization of code and proper coding habits, and the trick after this will be to combine it with all I learned is possible to do with coding in ICM, and make different kinds of projects and keep it up. It really does feel like learning a language and as with any language there is a hump that you have to get over before it starts to feel more like second nature.

Day 96 @ ITP: Animation

Today I am attempting to start my final animation in Unreal, after going through a few tutorials and playing a bit with the architecture of the program, I still a feel a bit lost but am excited by the possibilities. It also seems that not all the content packs are compatible with High Sierra, so most likely I think I will just be trying to get creative with the starter materials, of which there are a lot. I don't usually work with humans too much, I prefer working with abstract colors/shapes or animals if I am drawing. But it will be a good challenge! Right now my character looks a bit like one of the characters from Avatar the movie.

Will post updates soon...

Screen Shot 2017-12-13 at 6.29.43 PM.png

Update December 13th:

I spent a few hours today sitting with my classmate and trying to figure out Unreal on a PC laptop from the equipment room. We both had realized we had upgraded to High Sierra on our Mac laptops and weren't able to use the animating function of Unreal. We were trying to figure out importing a character on the PC out without too much success but we did start to build a world together with floating cubes that went up into the sky like a ladder (I forgot to take a screen shot!) and looked at various characters and tutorials on how to import them and navigate Unreal. It seems very complicated. But I think if I was walked through it once one on one, and maybe had time with it on my own laptop, it would make more sense. I ended up heading home because I thought I would be able to install it on my Desktop computer, but the operating system on that one is just one version too old... 

So at this point since I think I will be working on it at home for the rest of the night, I am thinking I will create a world in Unreal with a 3rd person character, and use a screen recording to follow it around as it moves. 


Update 12/14:
My final animation