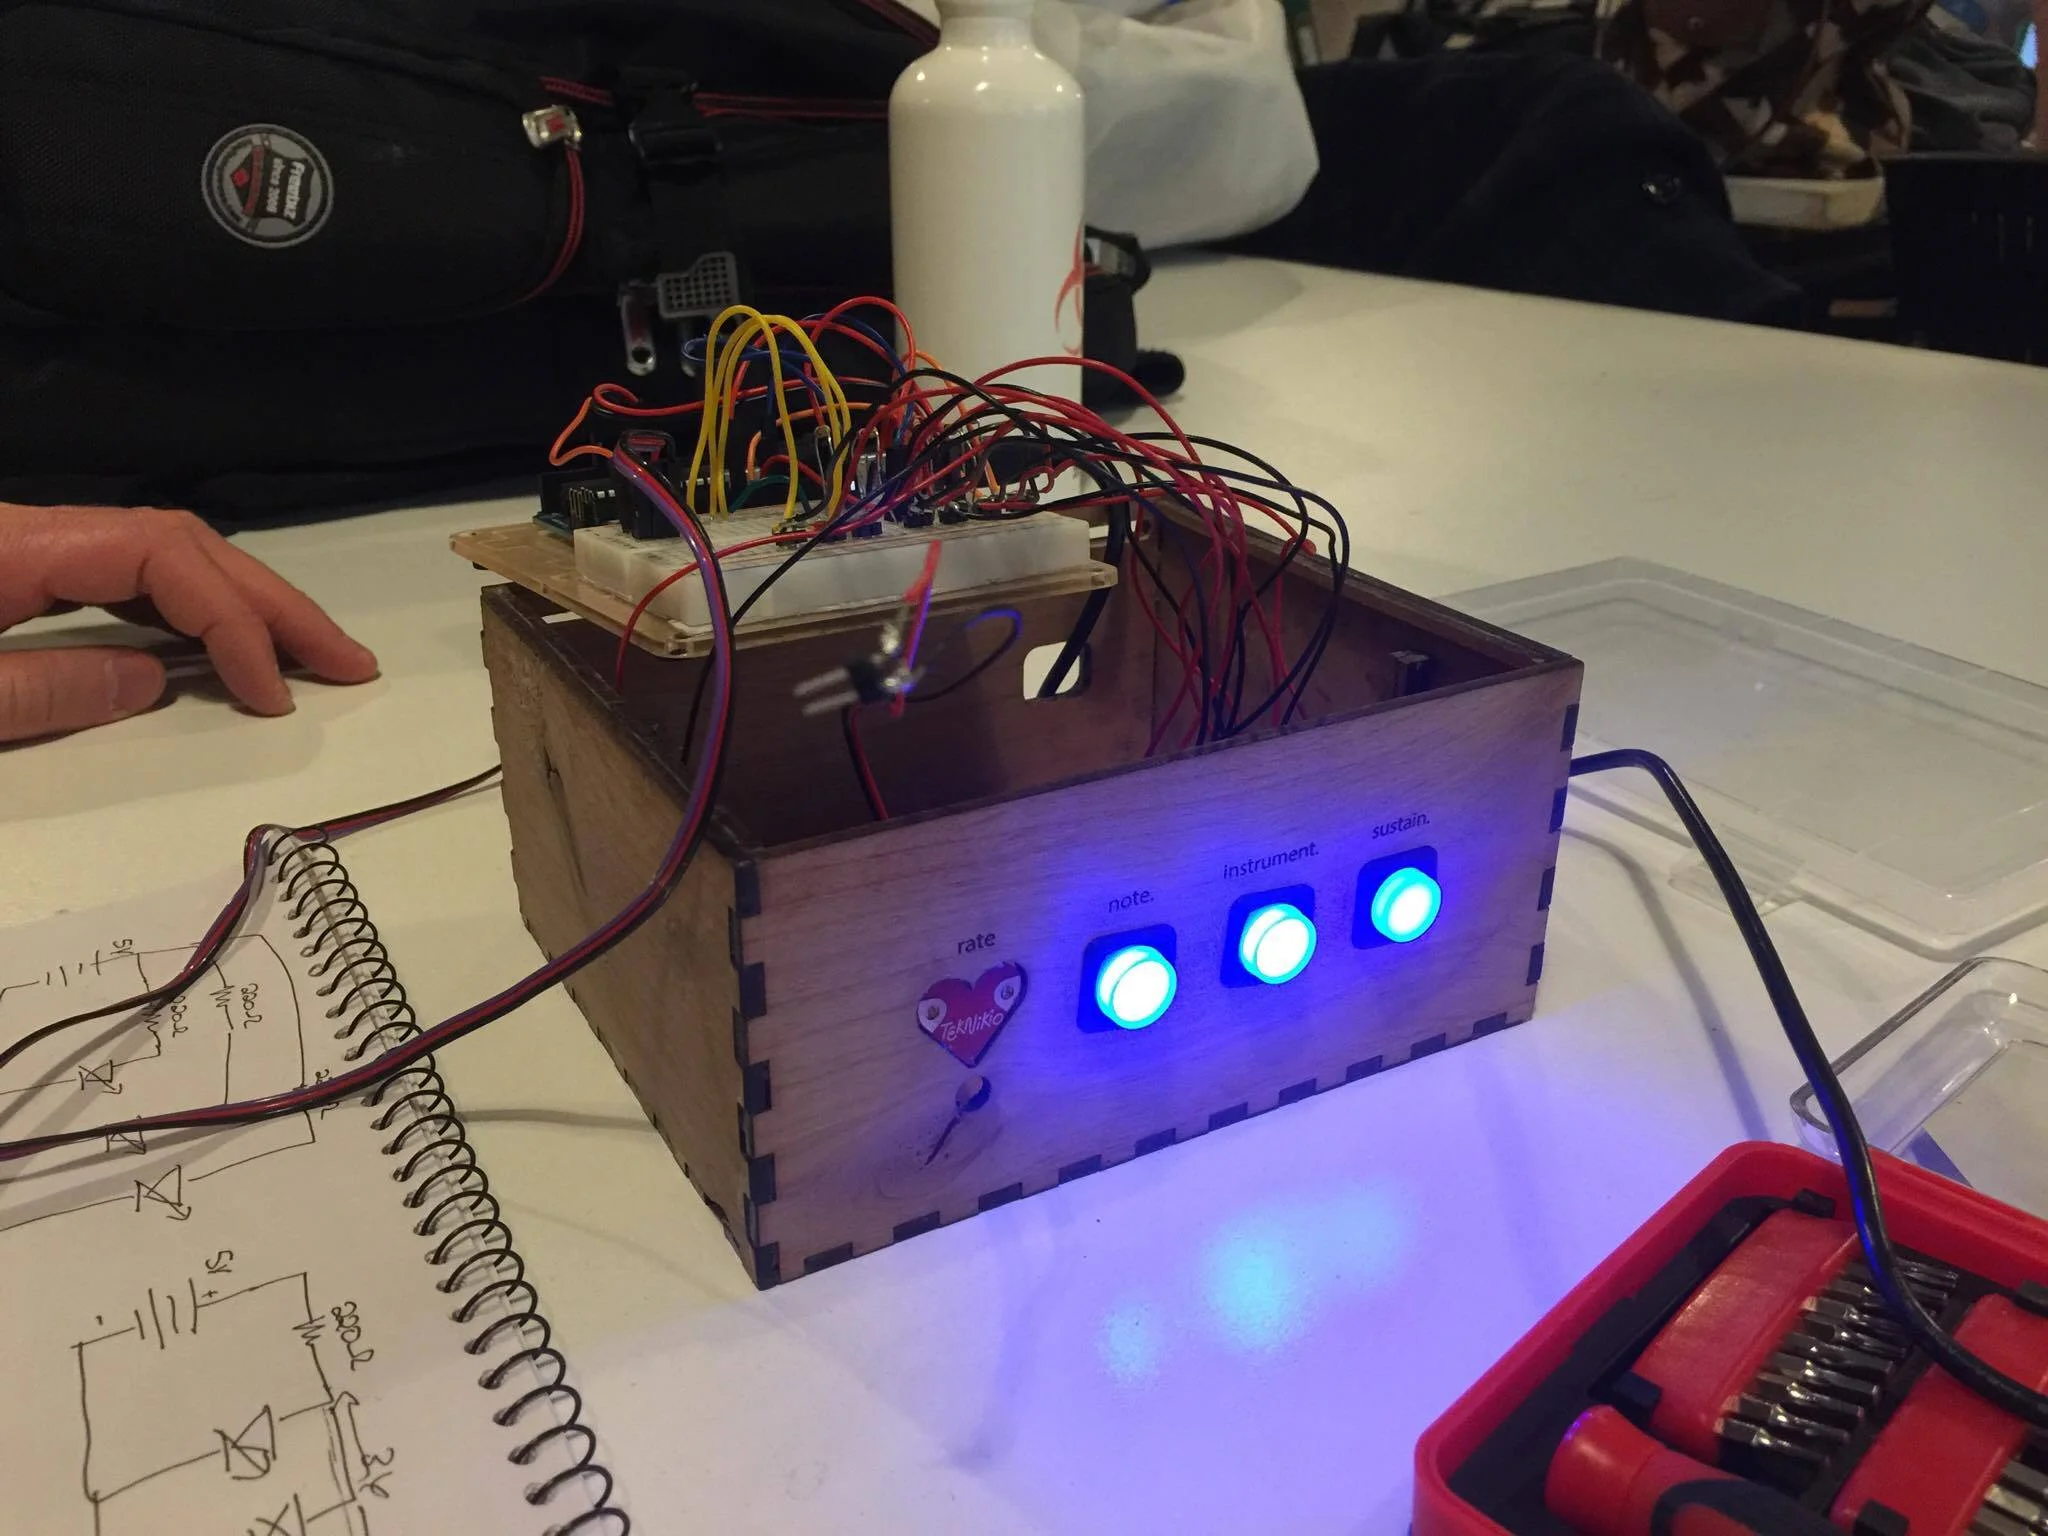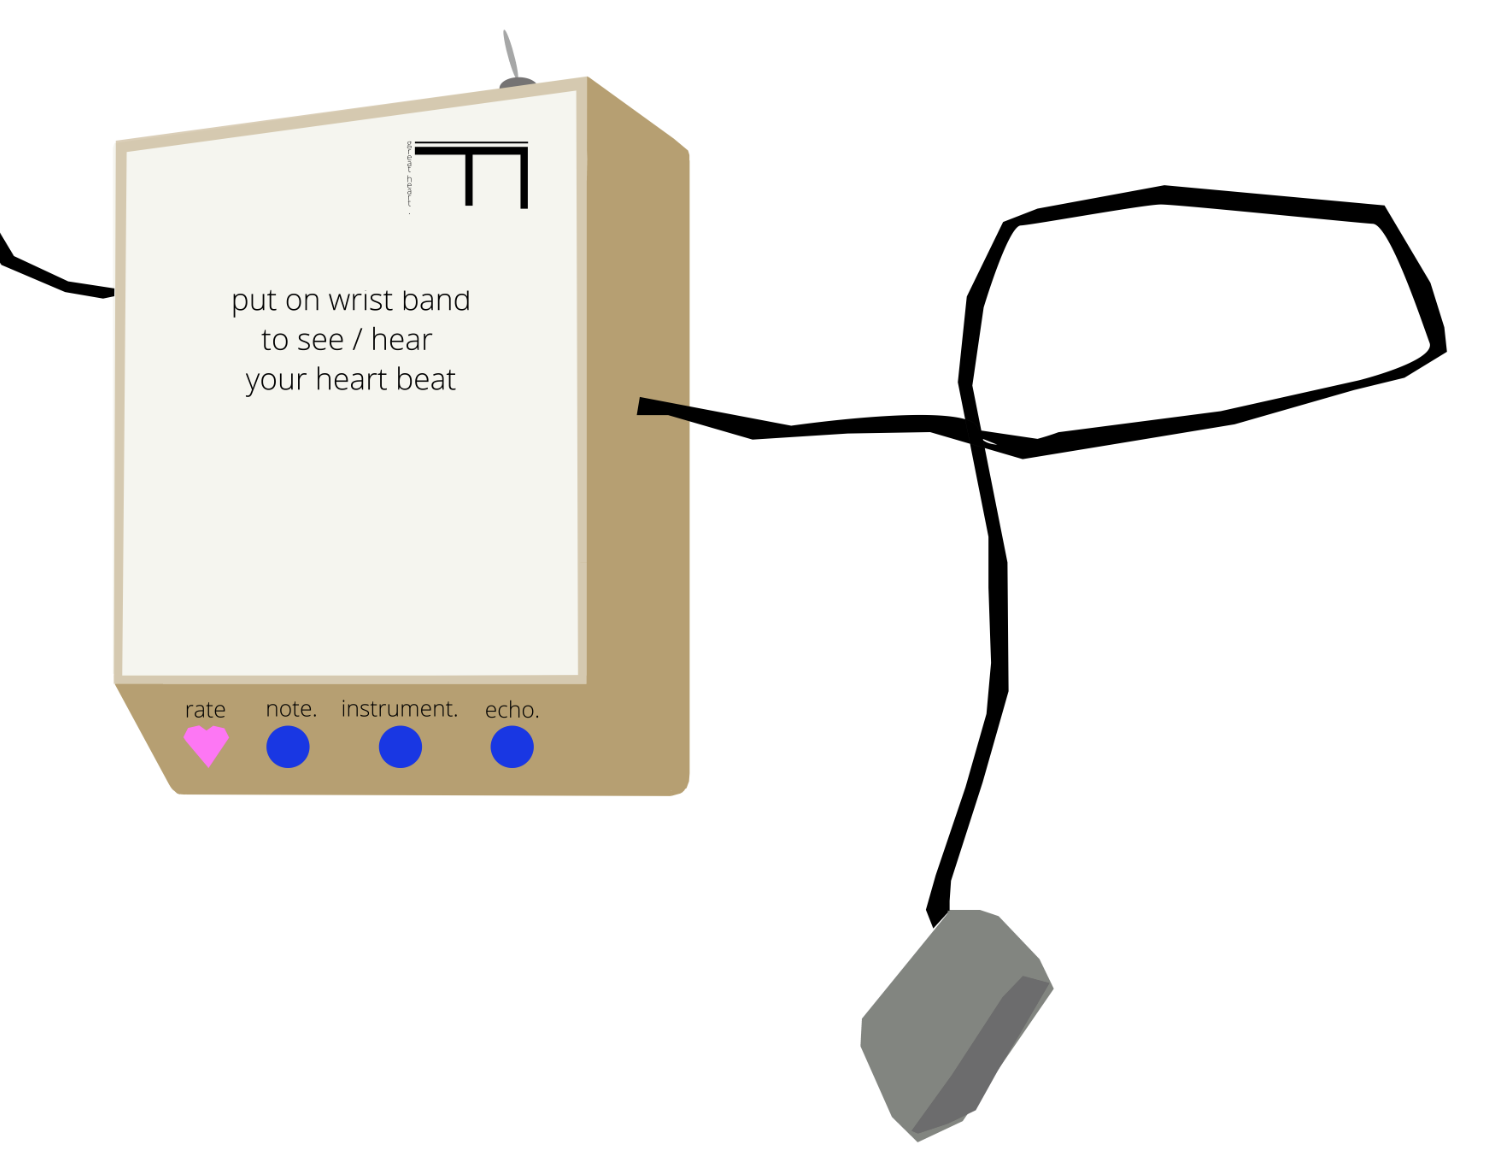
Great Heart — Questions for User Testing
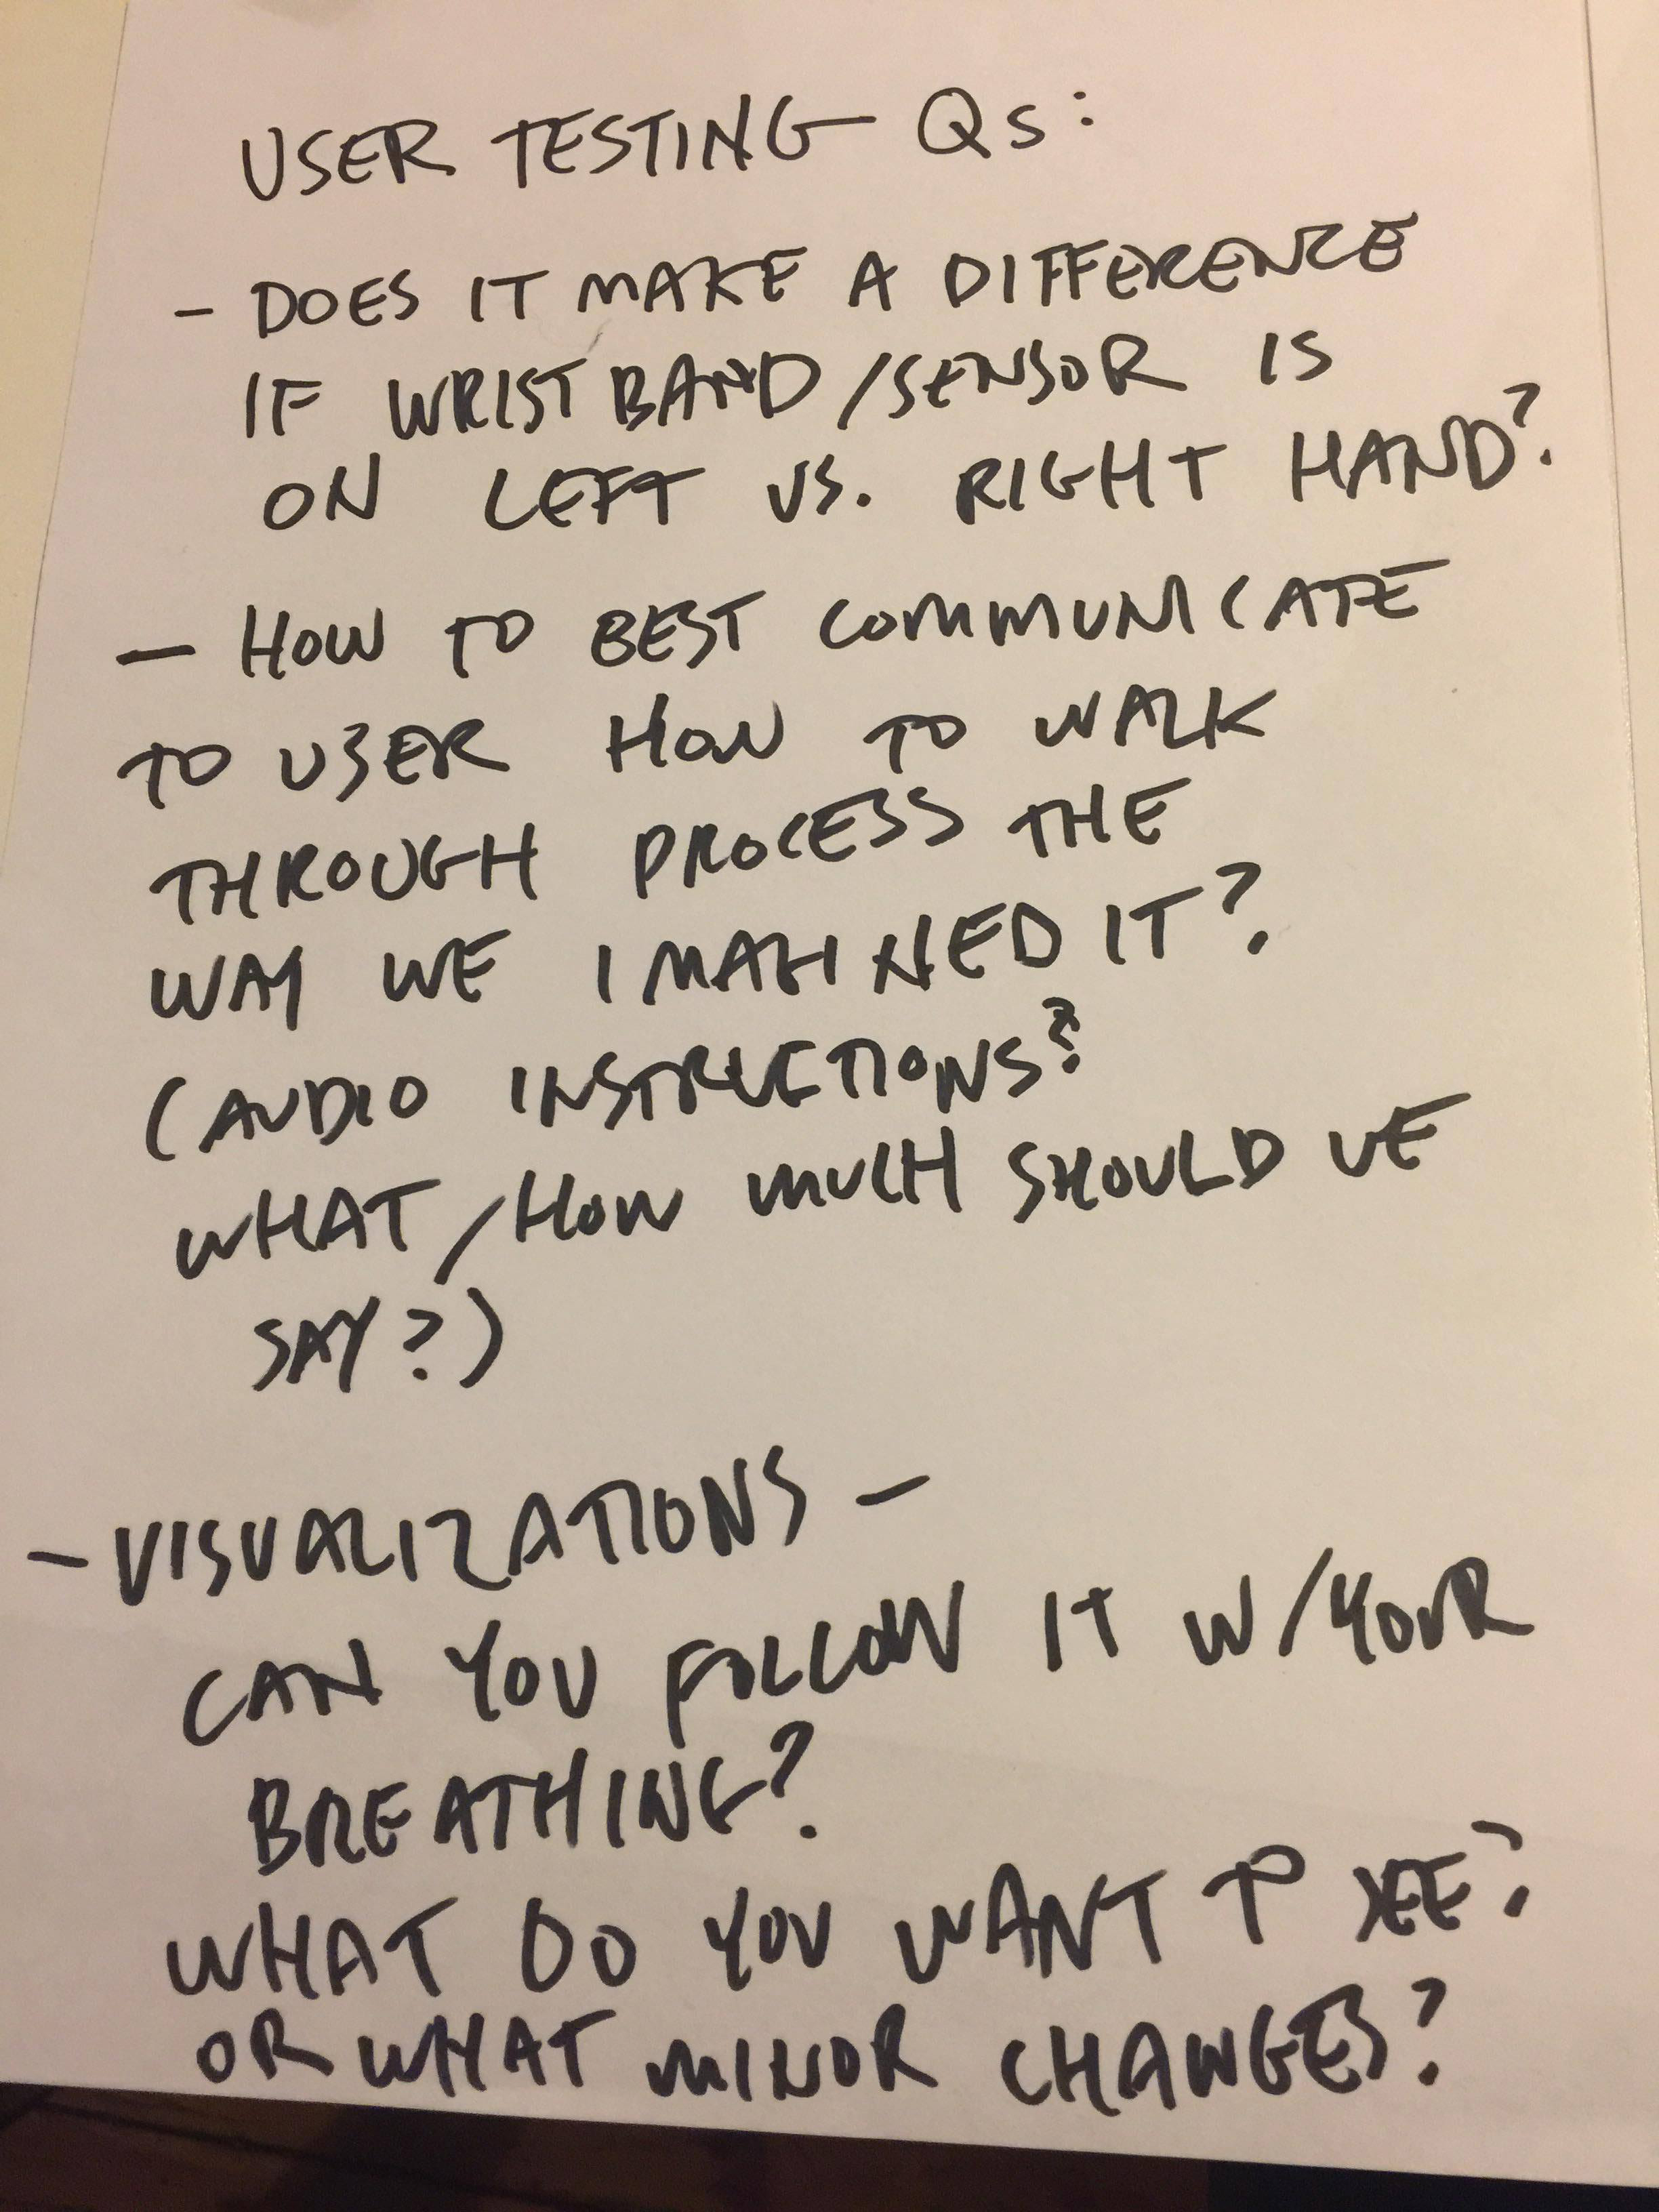


Screen shot of the breathing visualization #3 w/ blue ring (between heartbeats)

Breathing visualization #3:
blue ring + pink orb which triggers w/ heart beat
Today Jim and I got together and coded the visualization with some new images, and made a video of our project for applying to the 2017 winter show. For now there are 3 visualizations. I will also be showing this project as my final presentation in my ICM class to share the part using P5 and also get some I'm sure valuable feedback there on the interaction...so far I have sat next to Jim and coded/typed while he explained what to do, which was extremely helpful for me-- and I hope also helpful for him to think about how it needed to be coded too? Not sure. He was very patient though. But it definitely helped with my muscle memory with coding to remember how to indent lines and add semicolons properly and put parentheses nested in the right way, etc. And also about using classes to organize code into sections, objects, and in general about simplifying code to the least amount of lines, and the syntax for that, etc. Jim's coding is very neat and simplified. I can't say that I would be able to recreate it or the math that is involved sometimes but it is starting to make sense to me, and it was nice of him to let me type. He explained how everything worked very well. At times I was able to fill in new parts on my own and other times I was pretty sloppy and left out brackets, etc, things I would not have caught for a while. So it was definitely very helpful to work with Jim on this (!) But I think we also worked well together, and had equal parts in conceptualizing it, and also both worked on fabricating it. Overall I am very proud of it and am interested to see what kind of reactions or suggestions people have!