
Week 6
Midterm project progress update
Today Jim and I had our second meeting about our midterm project. We scheduled an appointment with a resident, Nikita, to get some advice on project development for it. But first we met and tested plugging the Arduino with Jim's MIDI sketch into my computer to trigger more interesting sounds in Logic using a software synthesizer called Omnisphere. We did some troubleshooting using these instructions that were in the book "Arduino Music and Audio projects" on using MIDI Hairless with an audio editing program:

And...it worked! Apparently we just needed to install this driver for it to be able to work with other programs besides MIDI Hairless and we were able to successfully trigger notes with different voices in Omnisphere using Logic. We also figured out how to scale them there into different scales, and tested some other interactions or changes to the sound that we would potentially want to trigger using MIDI from the Arduino.
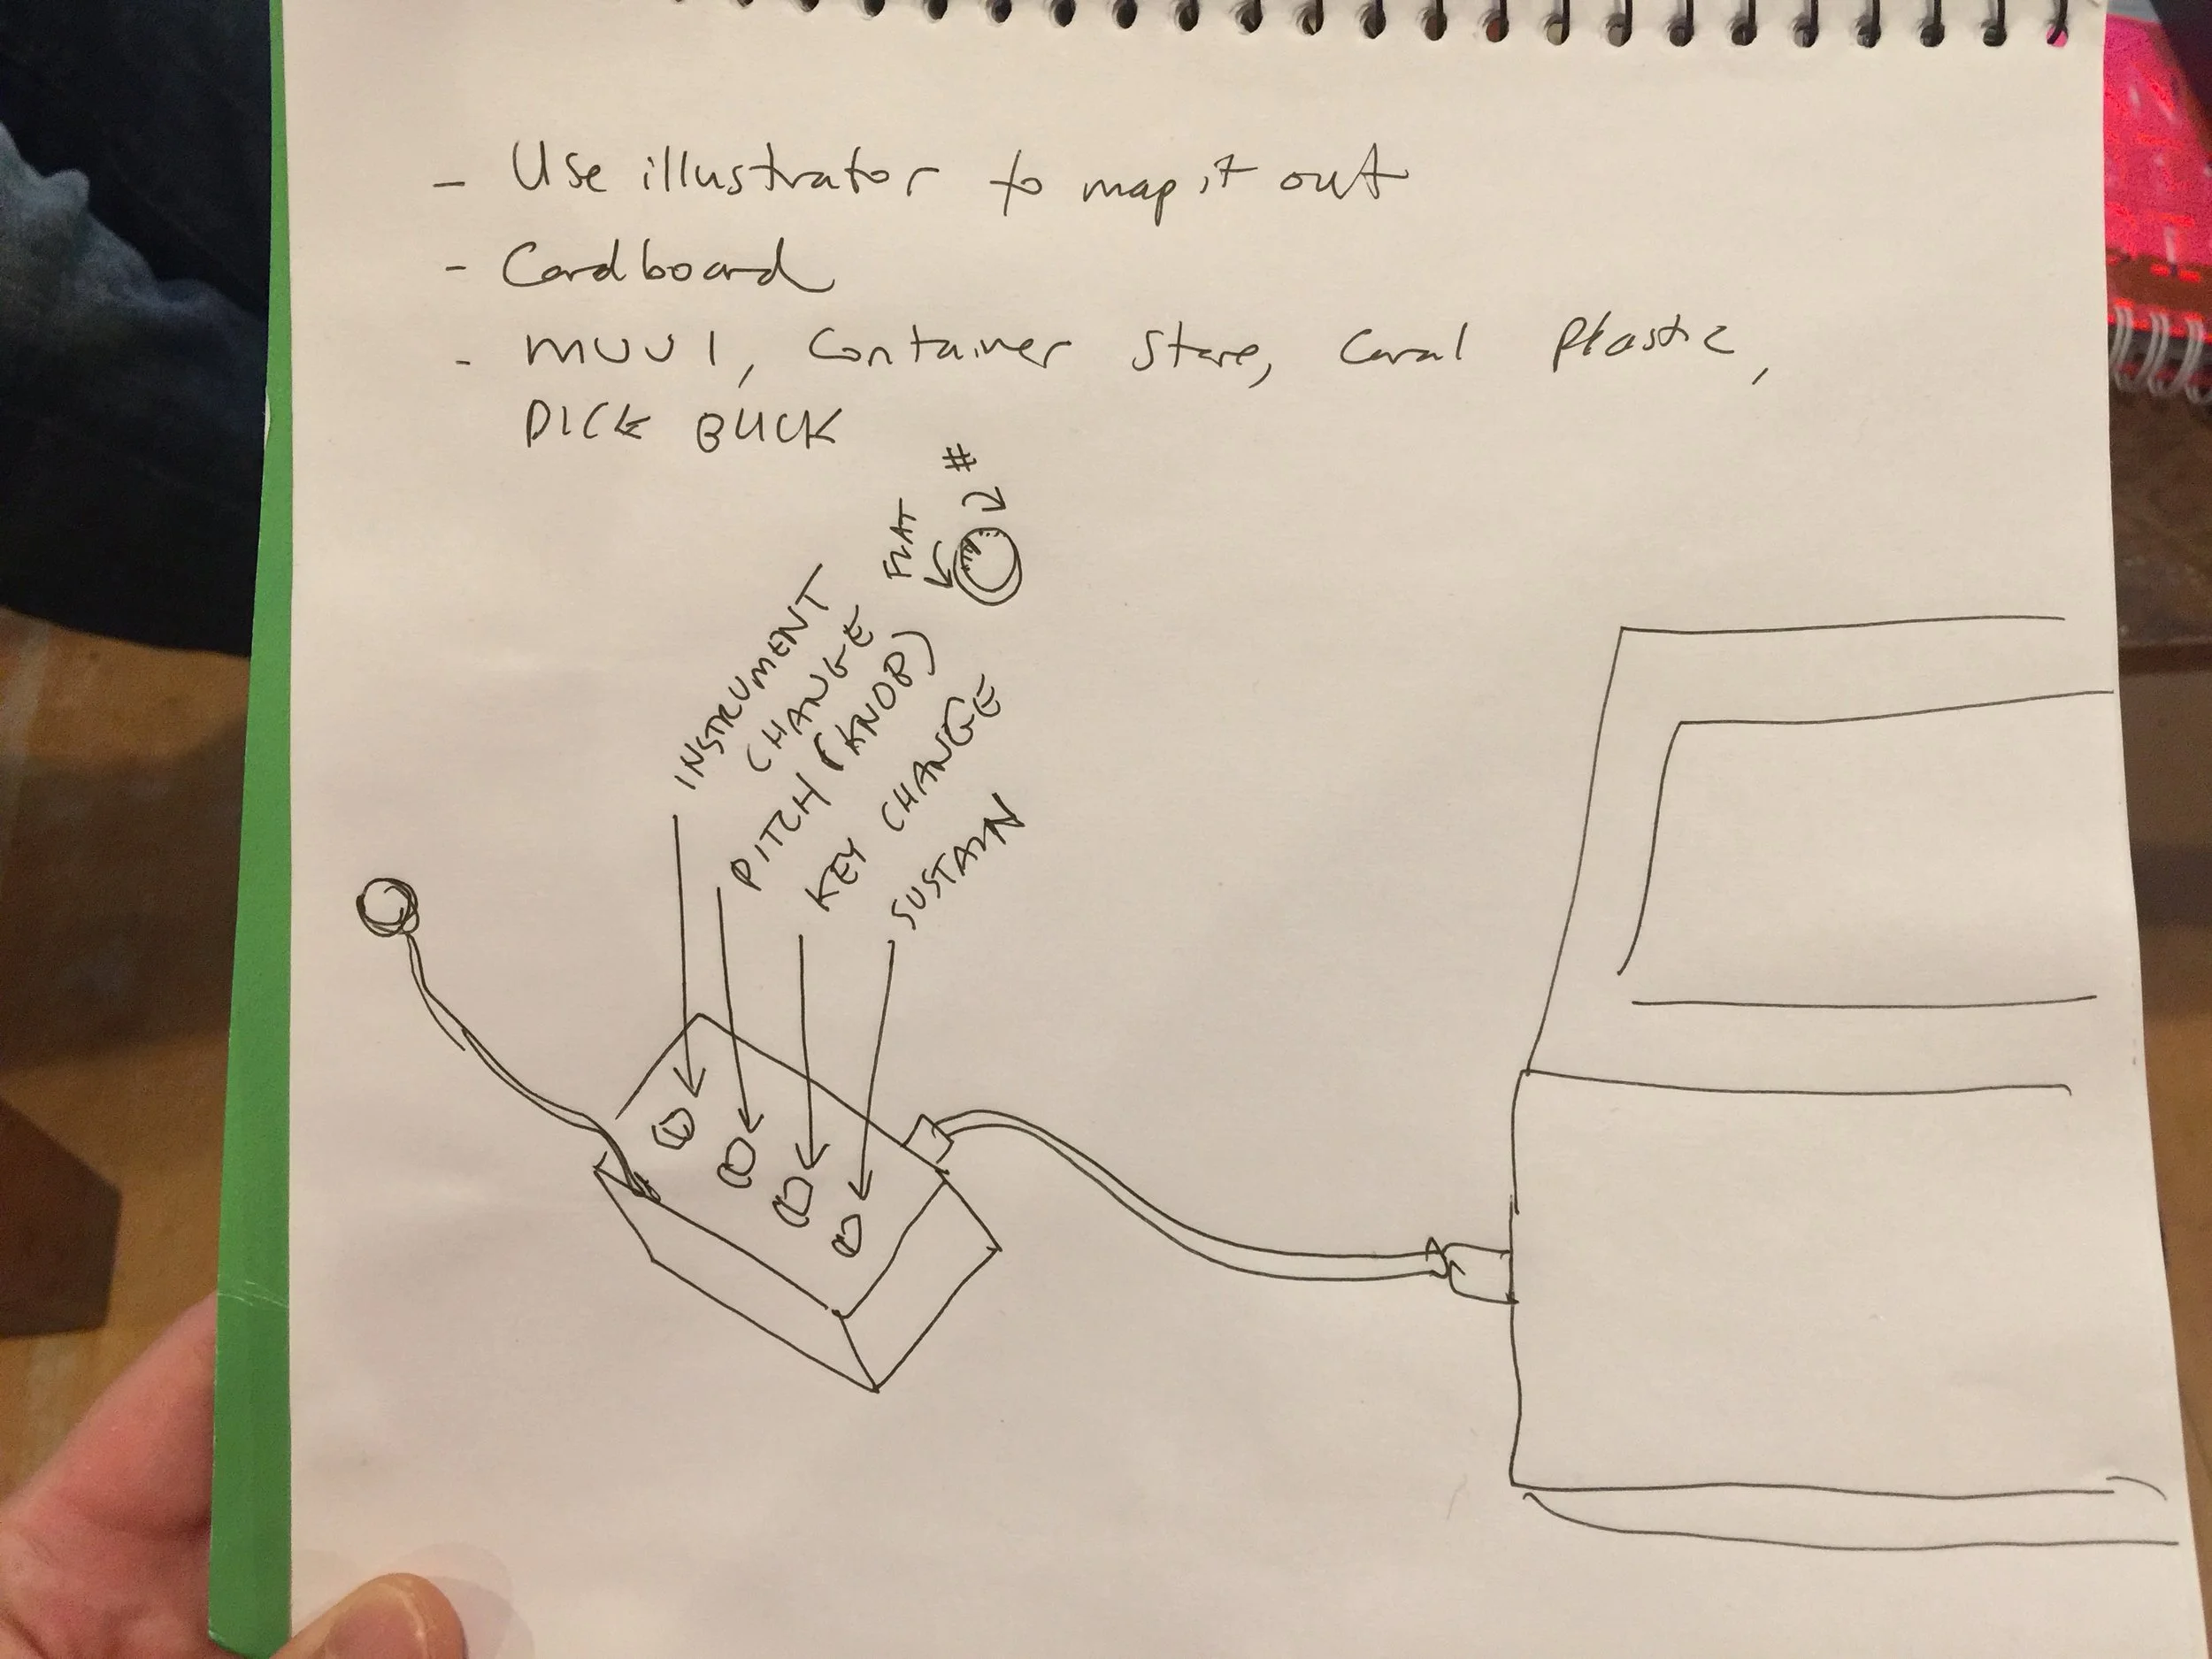
Then we met with Nikita and asked her about a few different elements: What the best kind of enclosure would be, and how to mount the buttons, were my biggest questions, as I am totally new to soldering, and haven't taken fabrication yet (And I also feel partially more responsible for designing the enclosure as Jim is helping a lot with the coding, though we are also making sure with each step of the project that I get the process for each element as well — his explanations are very clear and helpful!) She said we could use some of the buttons I have and hot glue them to a cardboard or cheap plastic enclosure. And with a simple laser cutting project we could map out the exact design we want to make in Illustrator and then cut the right holes, solder the buttons to wires so they sit properly above the enclosure, and that's about it. Also probably for this I could use an Xacto knife if we go with cardboard, which is probably what we will go with for this since it is just a prototype...
We also asked her about interaction design for it and what would work best, describing that we basically want to create a MIDI controller where the pulse rate sensor would change the tempo and play sounds, and a few buttons would change different effects on the sounds. It turned out she had actually made a similar project shaped like a Walkman using a plastic soap box, some of the same buttons I had acquired, the black push buttons (Note! she also said we could get buttons for free in the shop!), some hot glue to adhere them to the enclosure, soldering to attach the buttons to the breadboard, and functions from the buttons that made the audio play, fast forward, rewind and stop.
After our meeting for advice with Nikita, Jim and I regrouped to re sketch how we wanted our project to work. We also decided that a knob might be best for some interactions such as changing the pitch (to the left to make the note more flat, and to the right to make it sharp), and that we would add a button that would change which instrument is selected (based on how many times it is clicked), or change the key or scale (also from one button, based on how many times it is clicked), and one that would add a sustain to the last note triggered from the sensor.
We also tested the pulse rate sensor monitor and it worked, reading Jim's heartbeat and sending it to the serial monitor and the serial plotter, looking much like a heart rate reading display in a hospital. We tweaked the parameters a bit so that the LED indicator on the Arduino blinked more like a heartbeat (at first it was blinking twice when it hit the threshold of 550, so we changed it to 650 and it started to blink more like a normal heartbeat rhythm).
Our next step is to code a button that will change a selection every time it is pushed...as well as figure out from the book which of our interactions will be doable using MIDI.